Import CSV
Import CSV is a gh-element that allows user to import data to application from CSV files. It turns each row of a document into a separate item. They can also be used to update existing items.
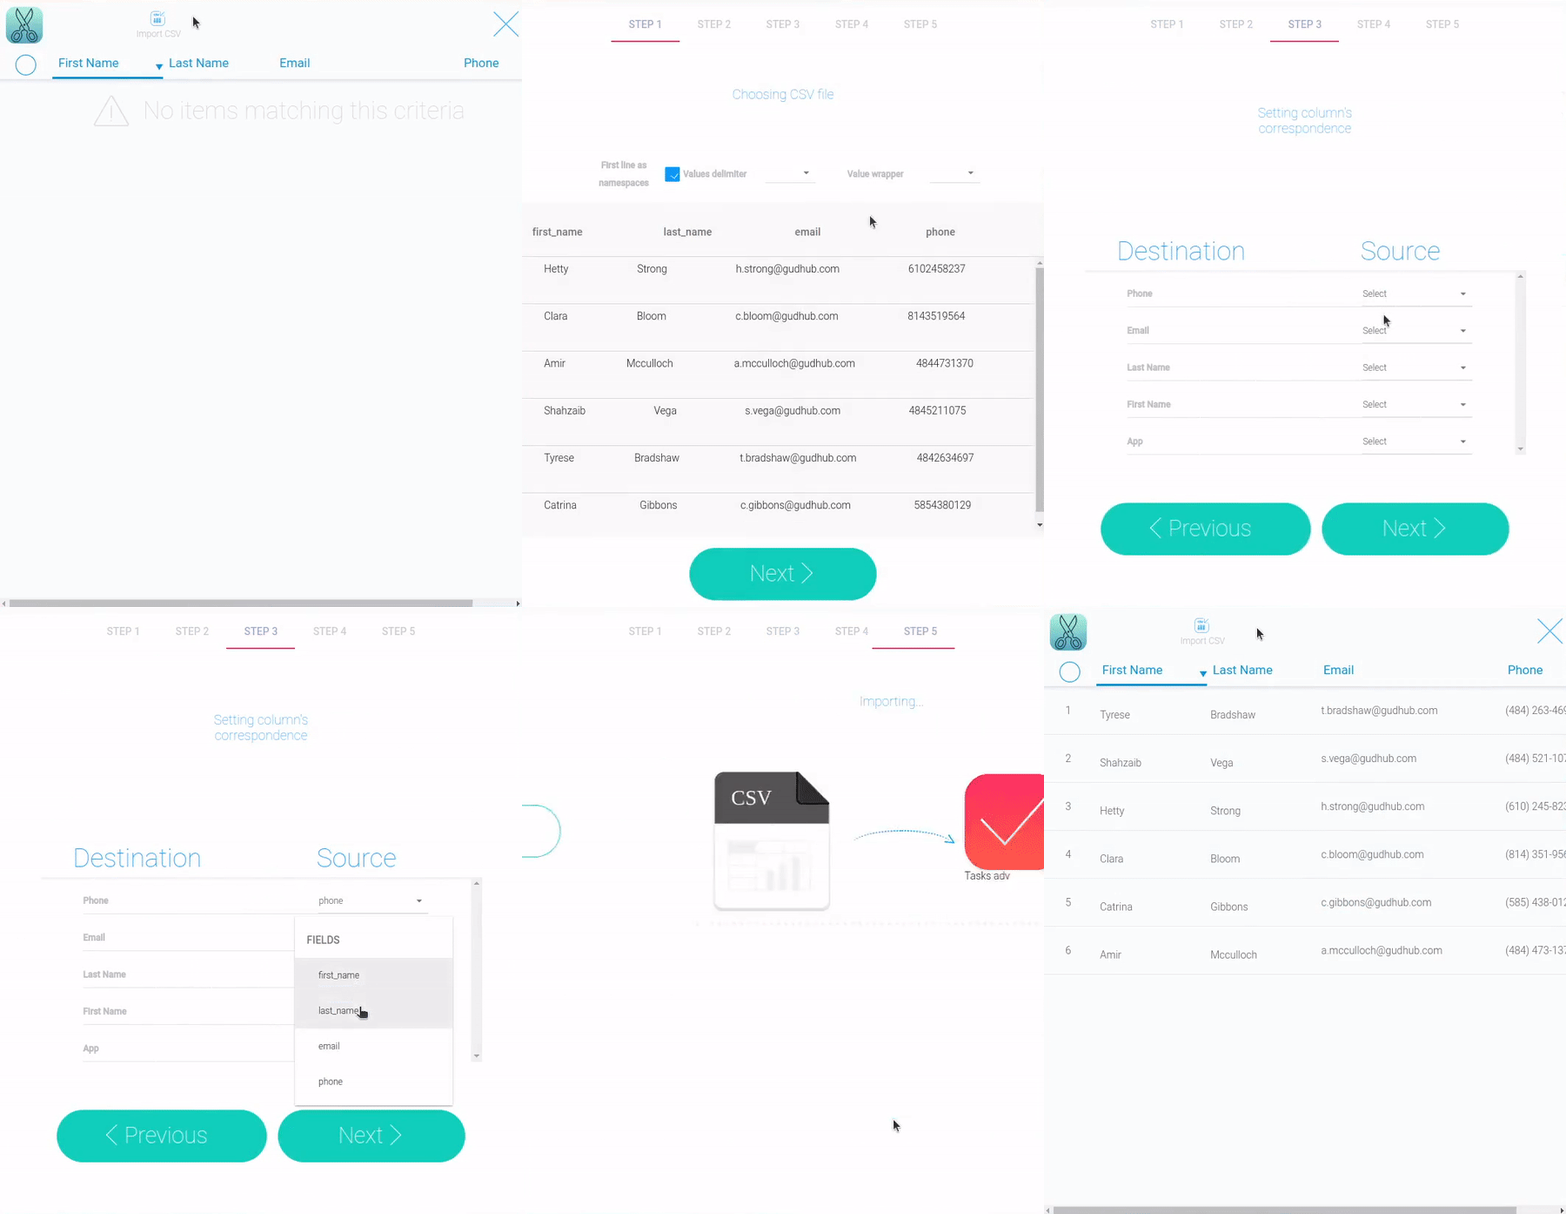
Despite the fact that this element does not require customization, it provides extensive functionality for transferring data from a csv file to the current application.
It is also important to remember that data can only be imported into the application where this Import CSV is located.
To start importing, users just need to click on the button. After that, the import settings will be opened in full screen.
Importing Data
The process of data importing consists of five steps. Each of them is responsible for a specific stage and contains a set of different settings.
Also, each of them has navigation buttons which allows user to move between steps. They are located at the bottom. They are located at the bottom. At the same time, in the upper part of the window, the user sees what step they are at and what its title.
Step 1. Choosing CSV File
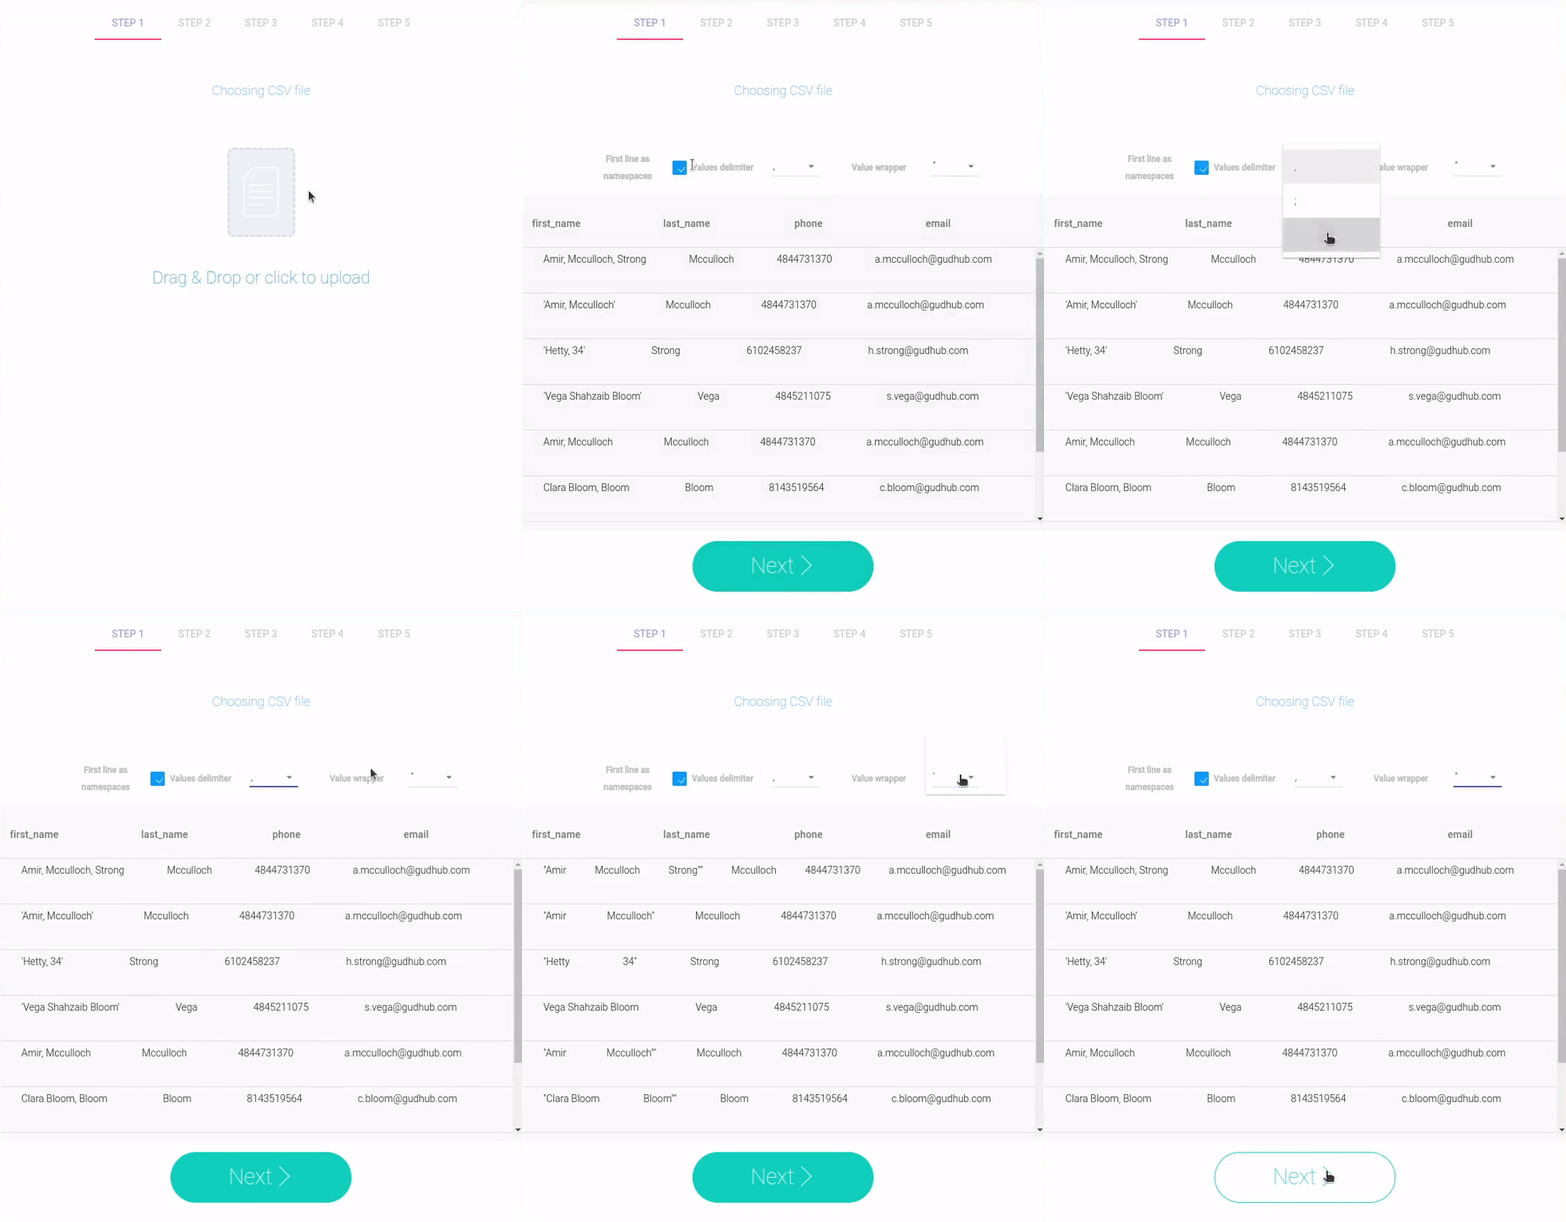
The first step is to upload a CSV file and prepare its data for import. To do this, the user first needs to click on a specific area and select a CSV file or drag it to this area. In short, it works like the File element.
After selecting a file, the data preparation settings appear. Here you set the namespace, delimiters, and wrappers for your data.
| Name | Description |
|---|---|
| First line as namespace | allows you to make the first line in the file a namespace; details... |
| Values delimiter | allows you to select a separator for columns; details... |
| Value wrapper | allows you to select the wrapper type; details... |
First Line As Namespace
This option allows you to specify whether the first line of the file is used as namespaces for the columns. These names will be used when corresponding fields to columns.
Values Delimiter
This setting allows you to select a separator for values in a CSV file. Due to it the current element can separate the values to fill in the application fields in the next steps. There are three delimiters are available:
- Semicolon
- Comma
- Space
So, you need to select one of them that is used in the file. You can check if you have chosen the right delimiter using the table at the bottom of the screen. If you have selected a suitable separator, the values will be separated by columns.
Value Wrapper
The wrapper here is a quotation mark, which denotes a value consisting of words separated by a comma, for example. This allows you to import a CSV file without separating the values inside the quotes into separate fields. But this is only if the comma is a delimiter in the file.
In this setting, single and double wrappers are available.
Step 2. Setting Importing Type
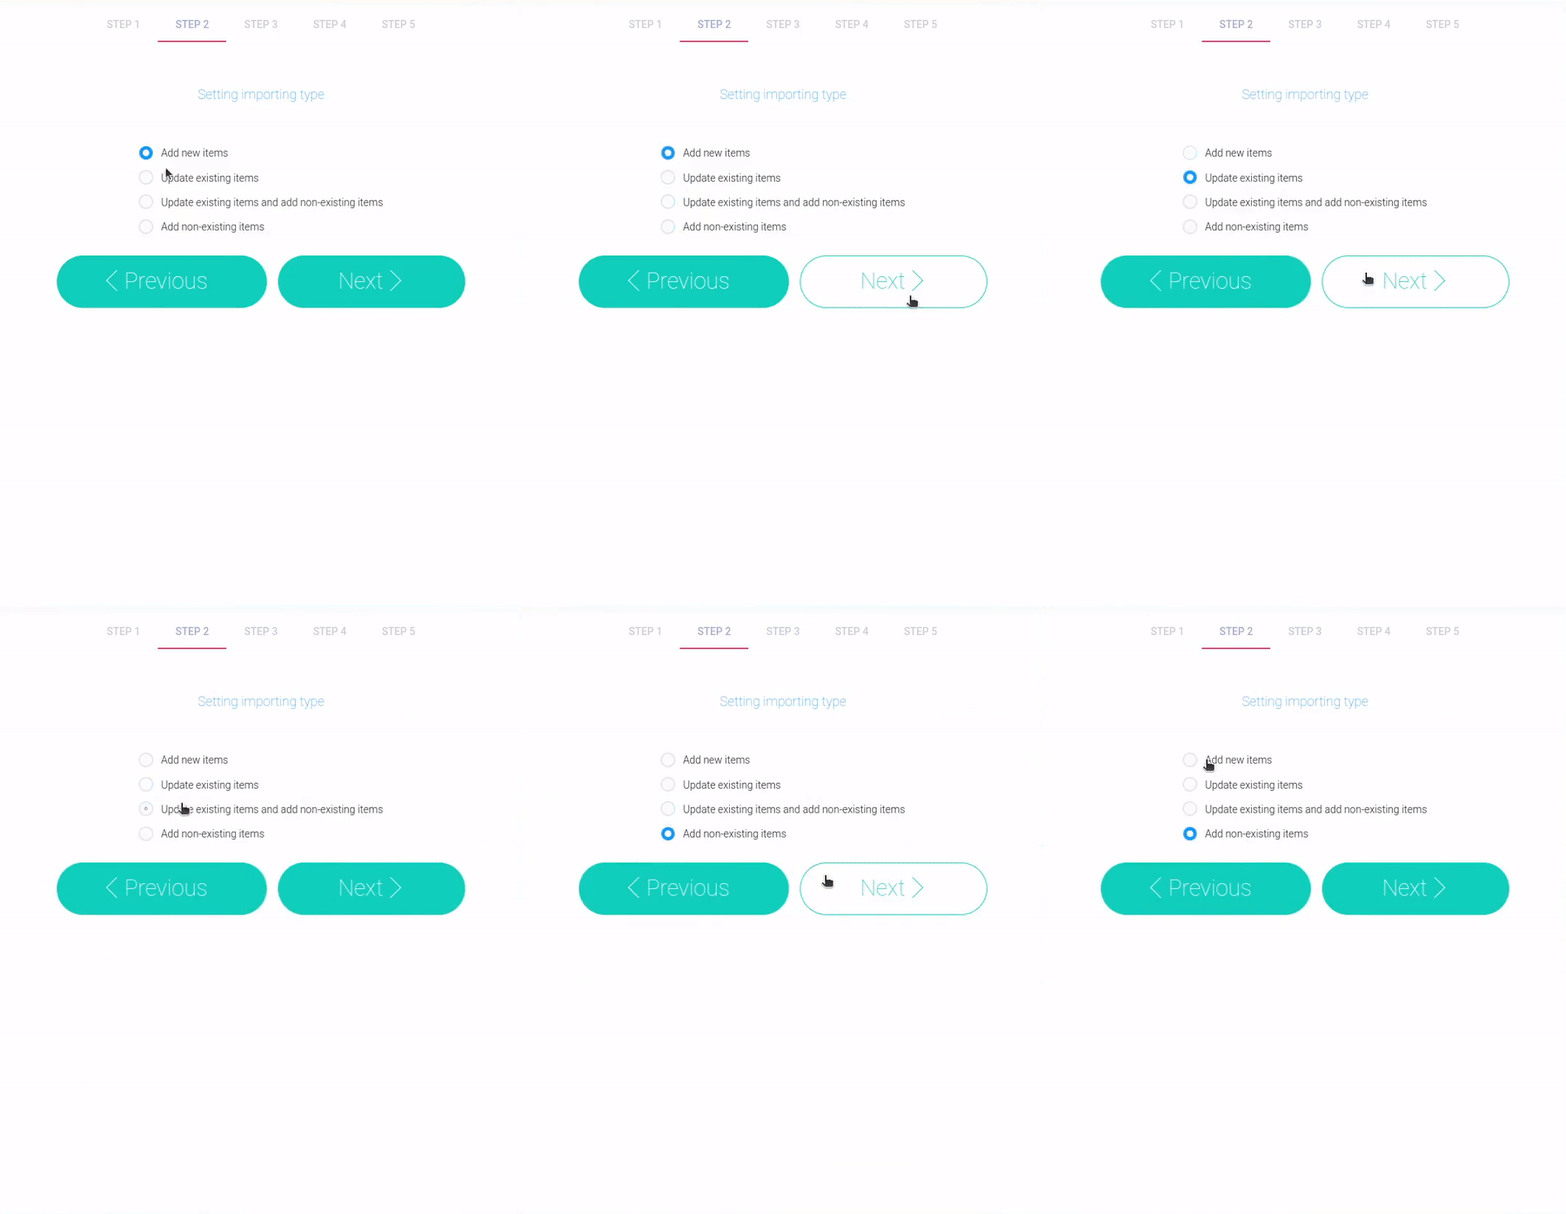
The next step is to select the importing type. That is, you must determine what exactly you need to do with the data from the CSV file.
In most of cases the data from file is compared with item in the app. Namely, rows are elements in a CSV file. Therefore, they are compared by columns and fields, respectively. In other words, GudHub takes a value from a certain field and compares it with a value from a certain cell in a column. If the values are equal, they are considered to be the same item.
The field and column for comparison are selected in the next step.
There are four options, and three of them use item comparisons:
- Add new items - create new items based on the imported data. The number of items created depends on the number of rows.
- Update existing items - update items in application with the data from the file. User doesn't have to update all items.
- Update existing items and add non-existing items - update the items that match certain rows of data and create new items based on the remaining rows that do not have a match among the items.
- Add non-existing items - create new items, but only from rows that do not match existing items.
Step 3. Setting Column's Correspondence
The third step is to connect columns to fields. This allows the element to pass data from CSV file columns to application fields.
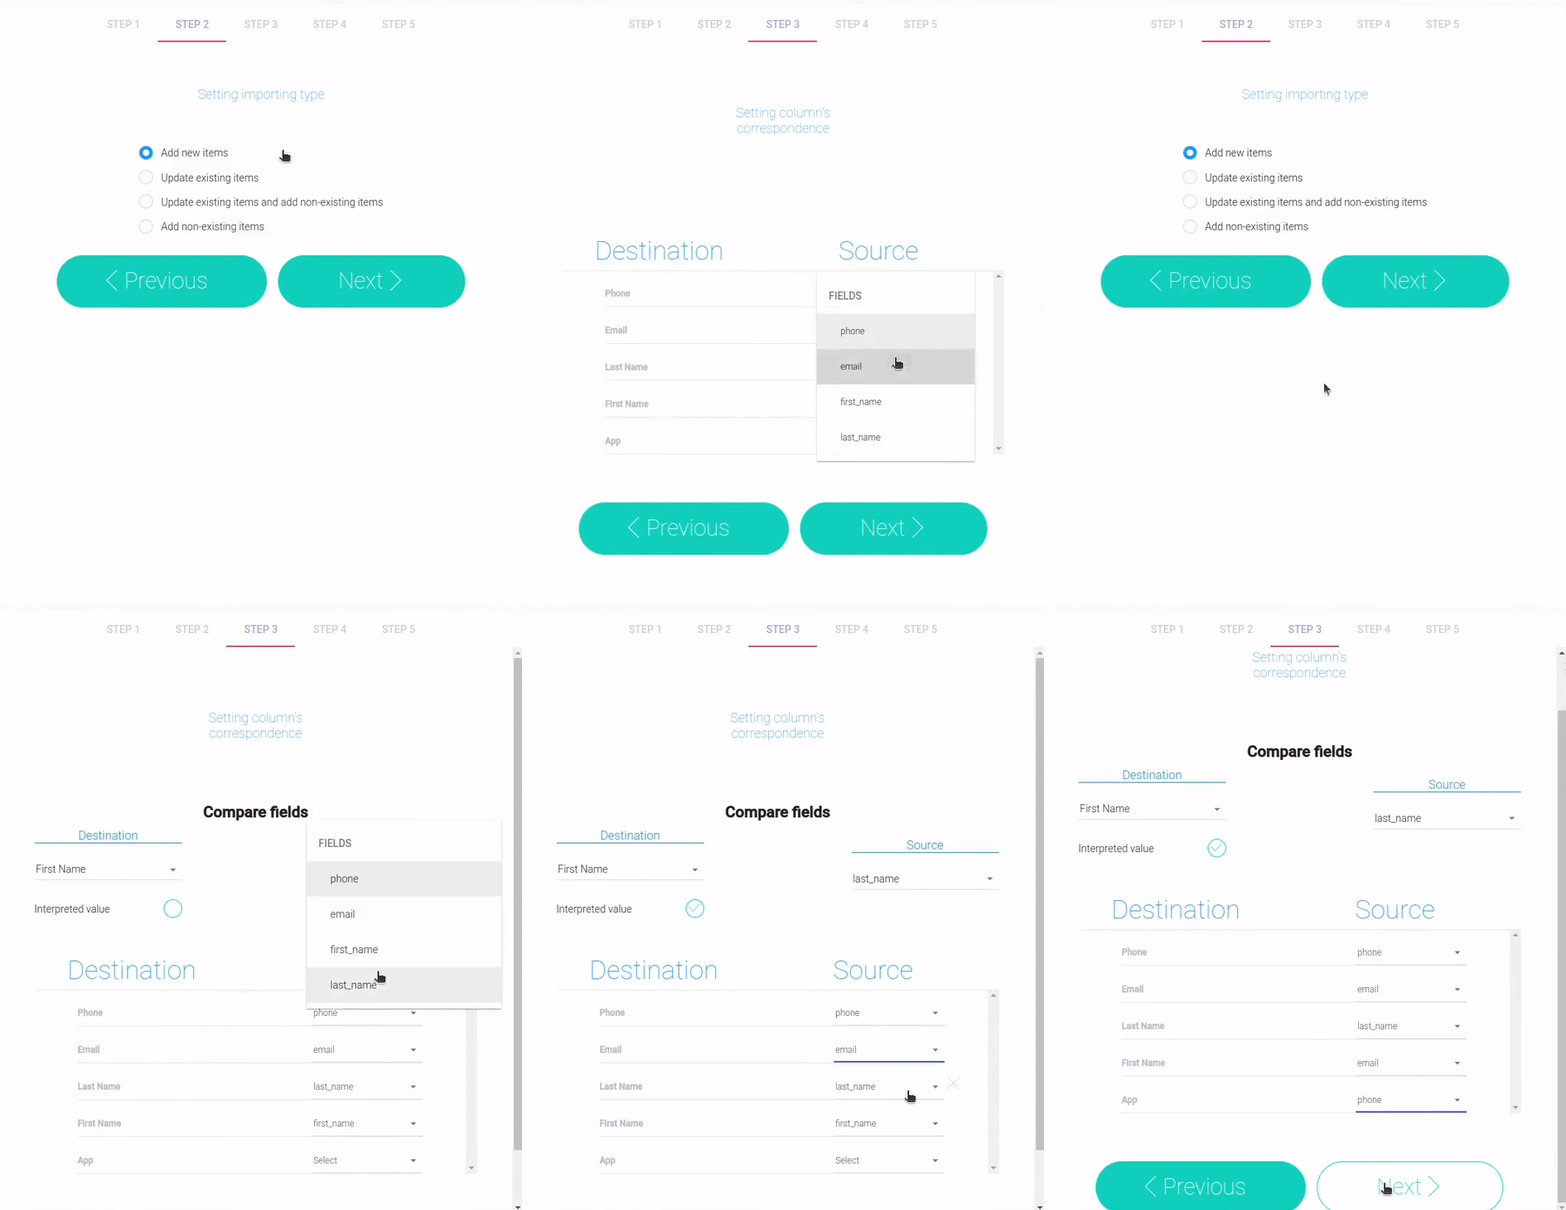
The main settings of this step consist of a list of all fields of the application. It looks like a small table in the middle of the window. Each of them has a list of options for the columns of the uploaded file. Here the user has to select the source column for the current field.
Unlike comparative options, the current setting is required for all import types.
Compare Fields
The other settings available on this step are the Compare Fields setting. They are important for identifying items in a file that have already been added to the application as new items. They are used in these cases:
- Update existing items
- Update existing items and add non-existing items
- Add non-existing items
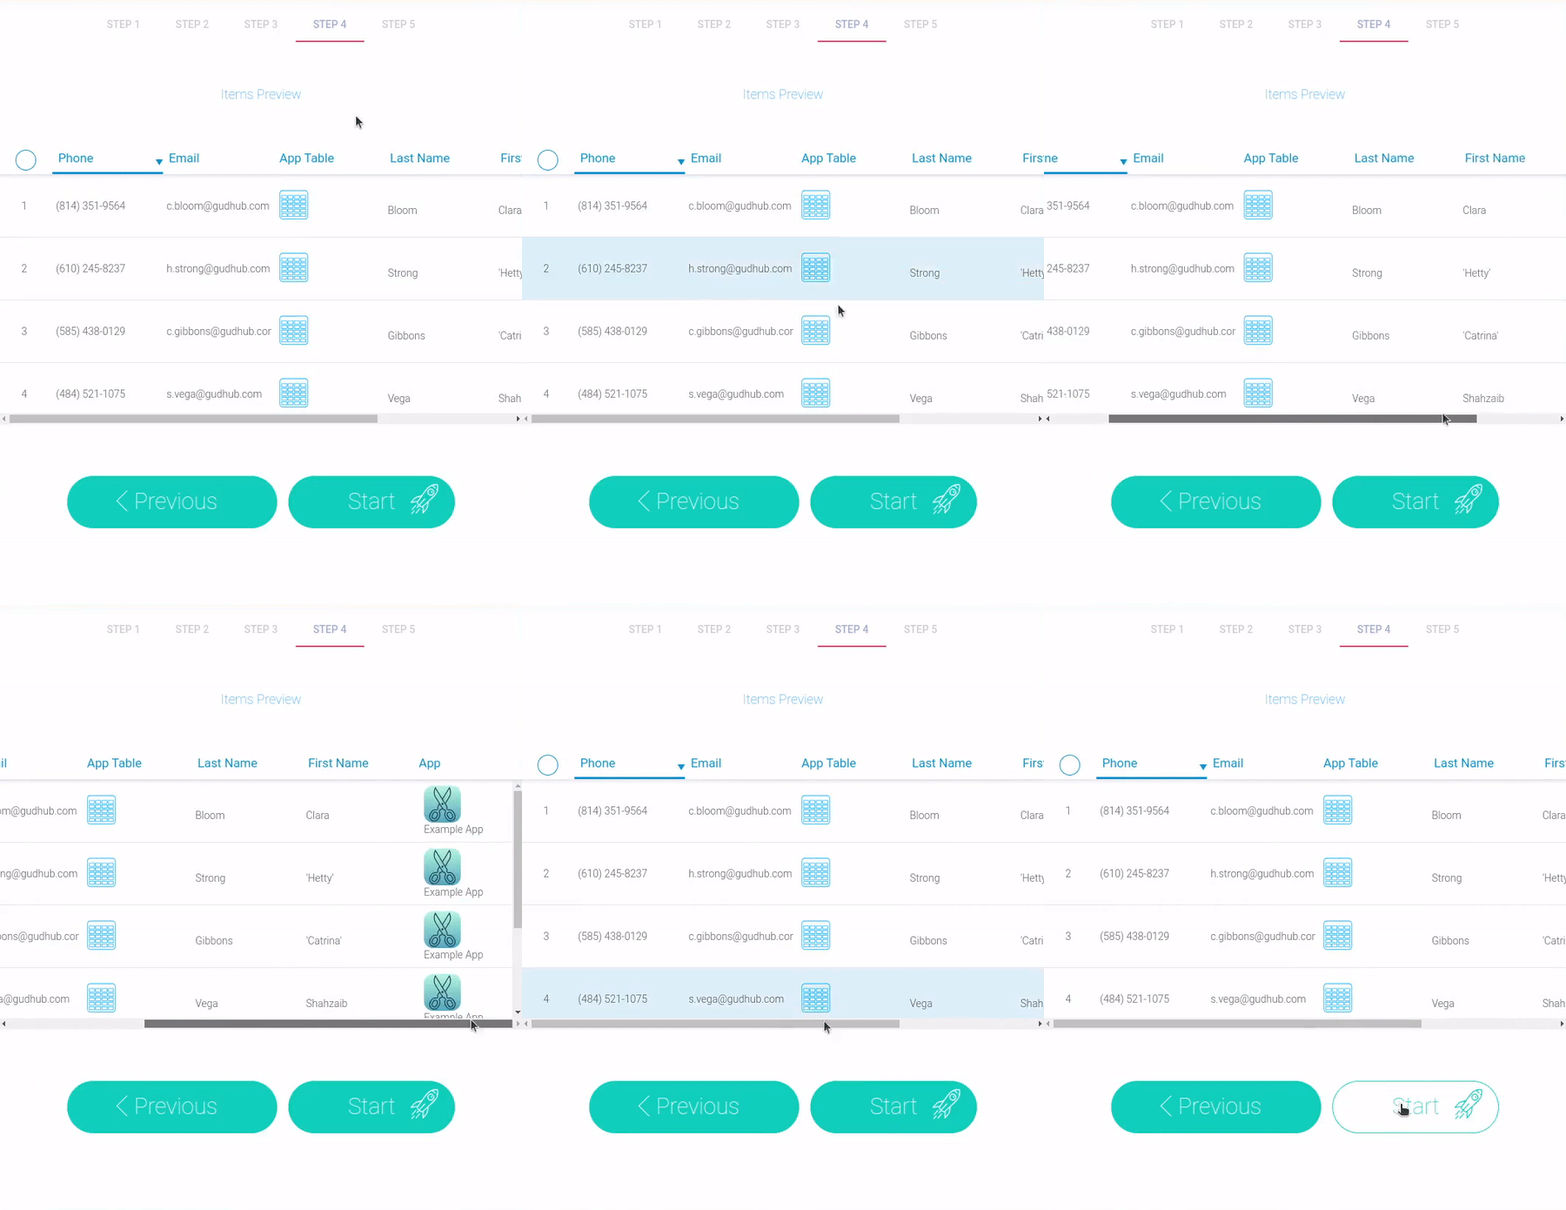
Step 4. Items Preview
This step allows the user to see the preliminary result of the settings.
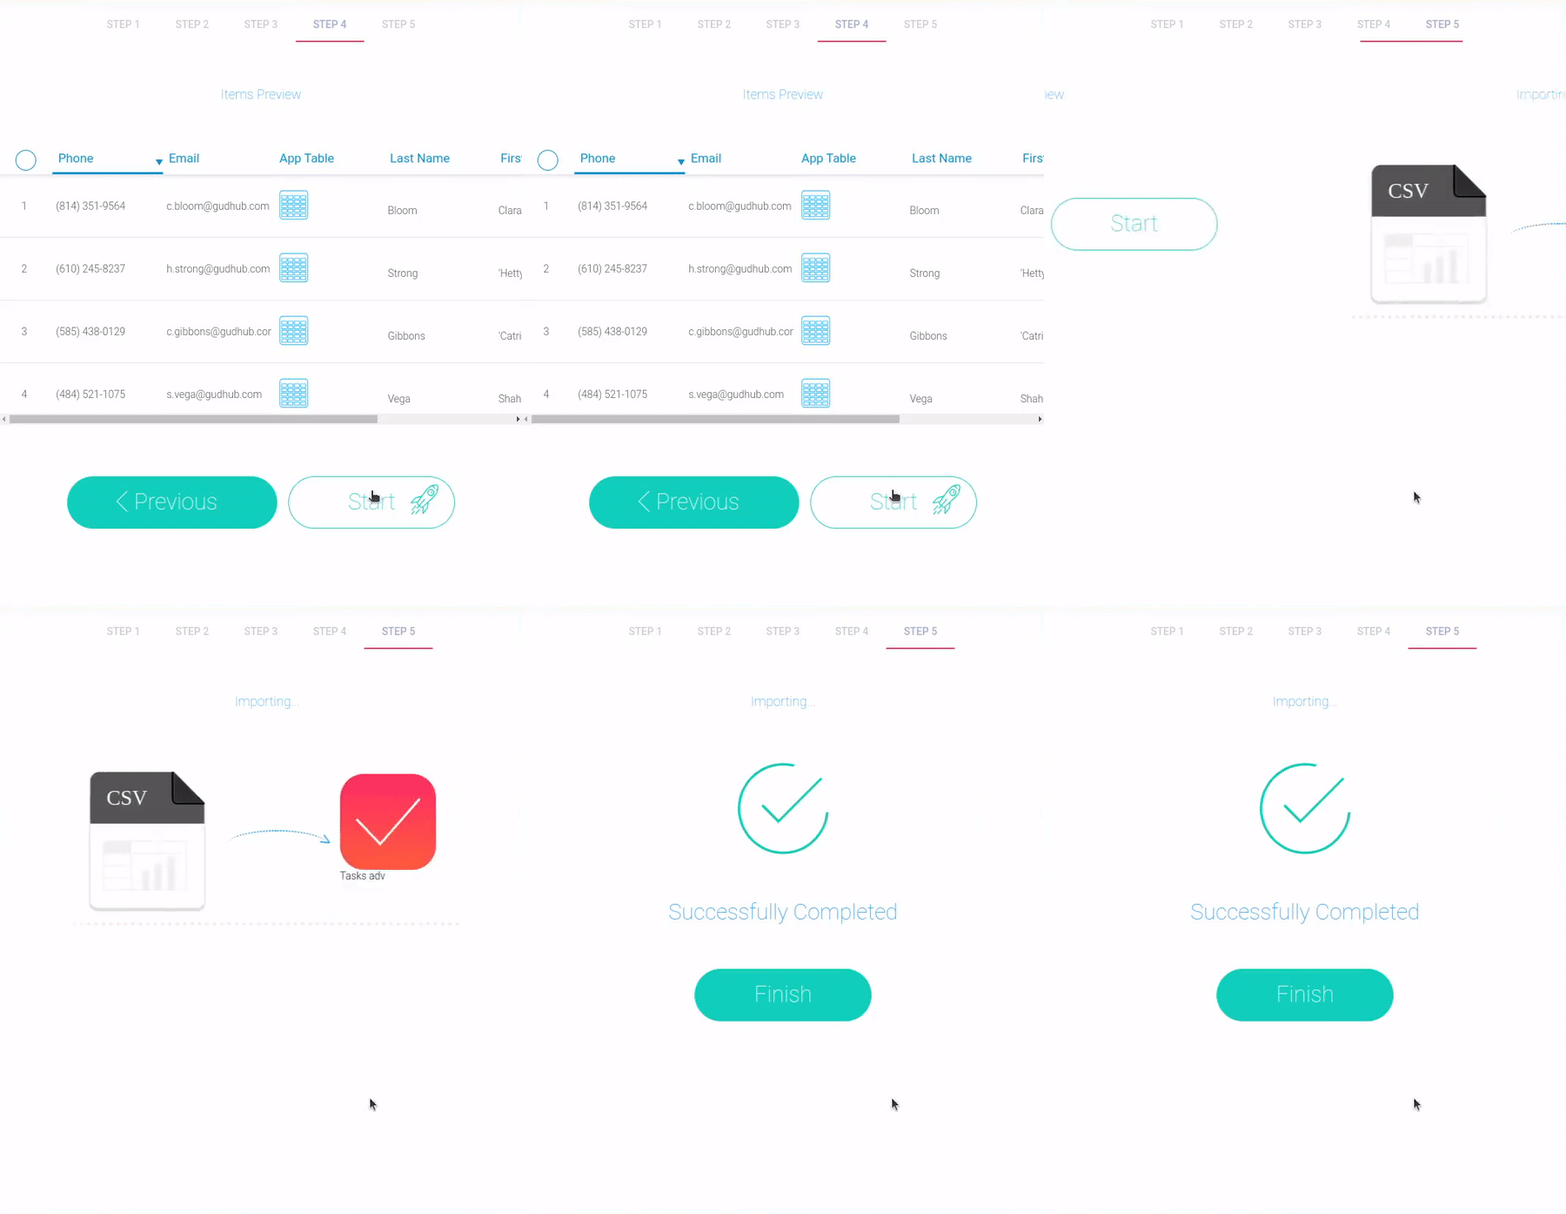
Step 5. Importing
The final step of the process. Here, the element processes all the settings and, based on them, creates and/or updates the items of the current application.
Functional Characteristics
As you may have guessed, the main purpose of this element is to import data from CSV files. This saves time and effort when entering data. You can also download data from other systems. It is a convenient tool for working with large amounts of data. So it also helps to update existing data. Use it, for example, when your company transfers data to a new CRM system on the GudHub platform.
Element Options
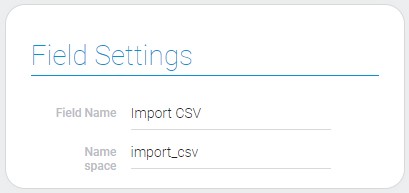
The current element has quite small set of settings. It consists of standard field settings described in Setting Overview.
Element Style
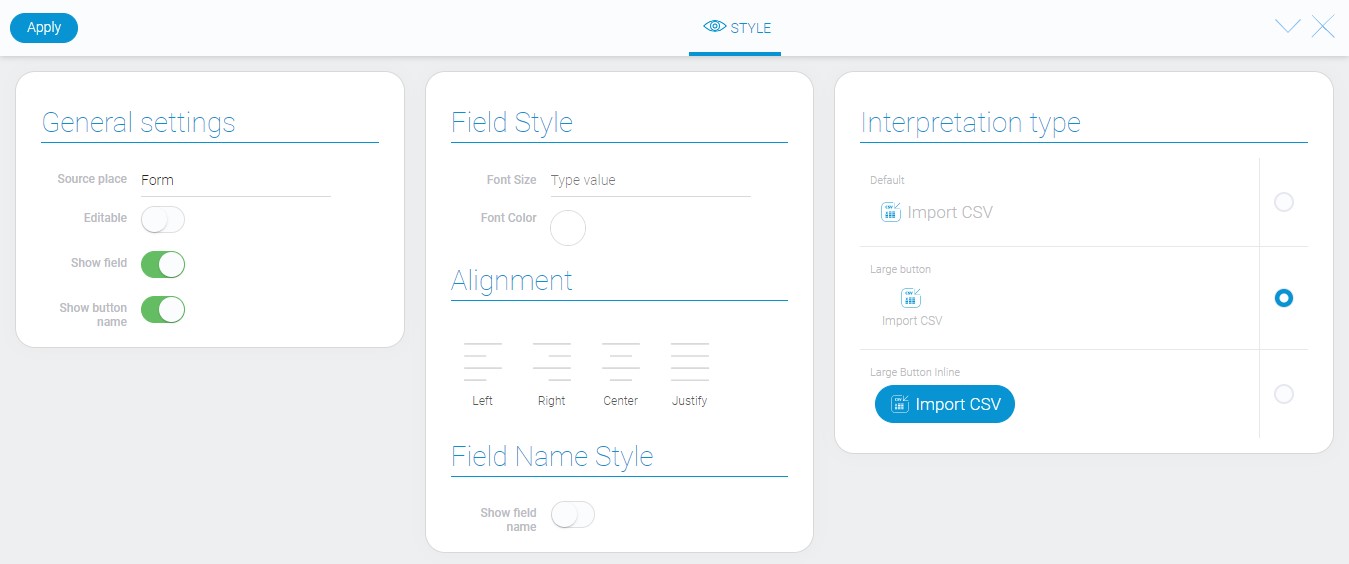
This element has the same style settings as all other buttons. They contains standard style options and option unique to buttons. Even his interpretation is very similar to others.
General Settings
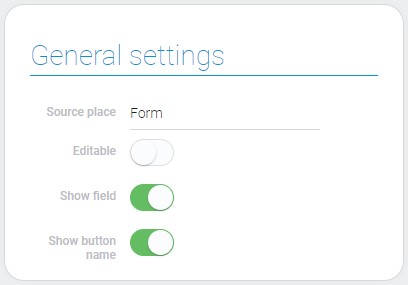
The only extra option is located in this group of style settings.
| Name | Description |
|---|---|
| Show button name | allows to hide the button name |
Show Button Name
This is the unique button setting that allows to configure whether the button name will be displayed or not.
Filtration
This element cannot be filtered out.
Interpretation
This element has three types of interpretation:
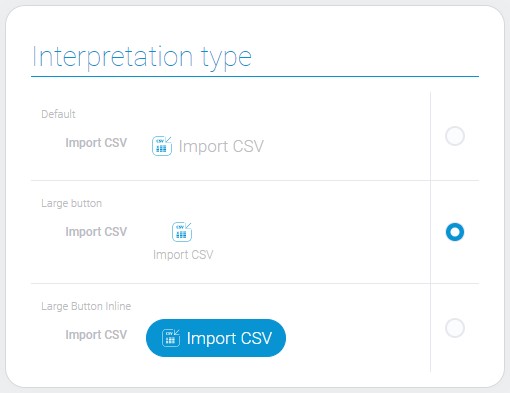
Default
This interpretation allows the element to be displayed as an icon with the button name next to it.
Large Button
This type is similar to the previous one. It displays the element as the icon and the button name under it.
Large Button Inline
The last interpretation type displays element as a big blue button.
Value Format
This element do not have field value.
Data Model
The data model of import CSV element contains only one property.
{
    "data_model": {
        "interpretation": []
    }
}
| Name | Type | Description |
|---|---|---|
| interpretation | array |
contains all element interpretations |

 Edit document