Automation Settings
Automation is part of the GudHub functionality. The essence of its work is to assemble nodes into a certain chain. In this way you can manually configure the automation functions. The process of setting up automation is described in Automation Overview. And, like all other features, it can be customized in a specific tab.
That tab consists of:
- The main workspace where you drag and drop nodes, assemble the automation chain, and debug it.
- The list of nodes
- Debugging switch
- Activation switch
The automation tab of some elements has a different look. For example, API has extra button and input field. Other element which have differences are Trigger, Smart Input and Quiz.
Workspace
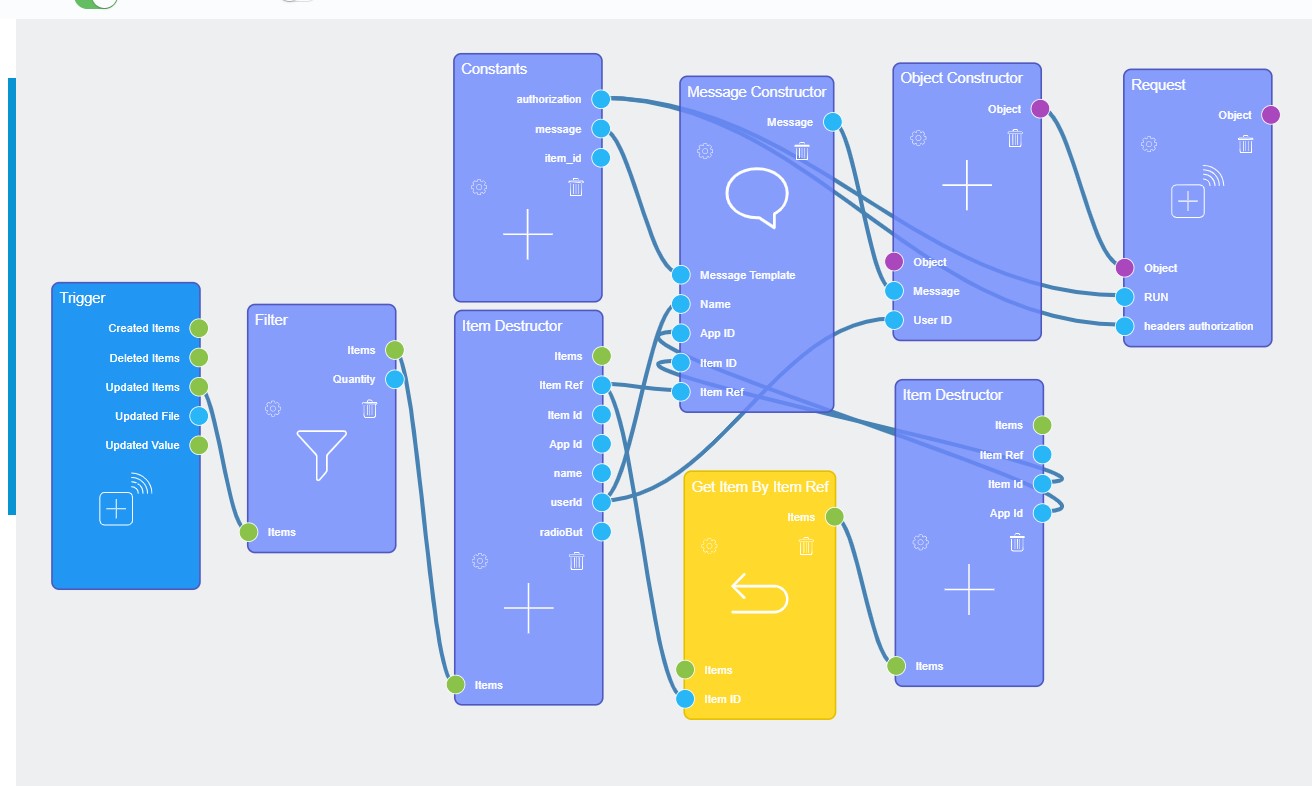
As was mentioned above, workspace is a main area of work with automation. Here you can drag many nodes, configure them and make chains to implement your ideas.
Nodes List
This is the list where all available nodes are stored.
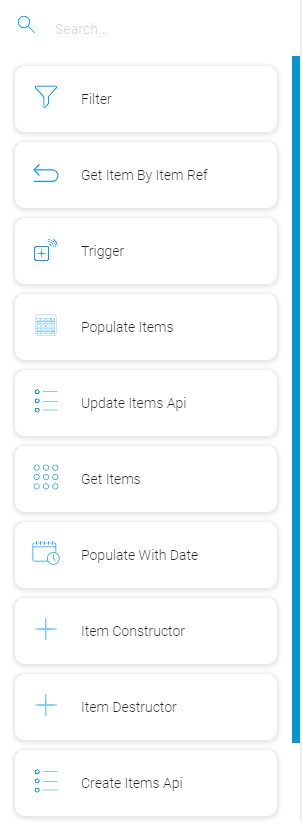
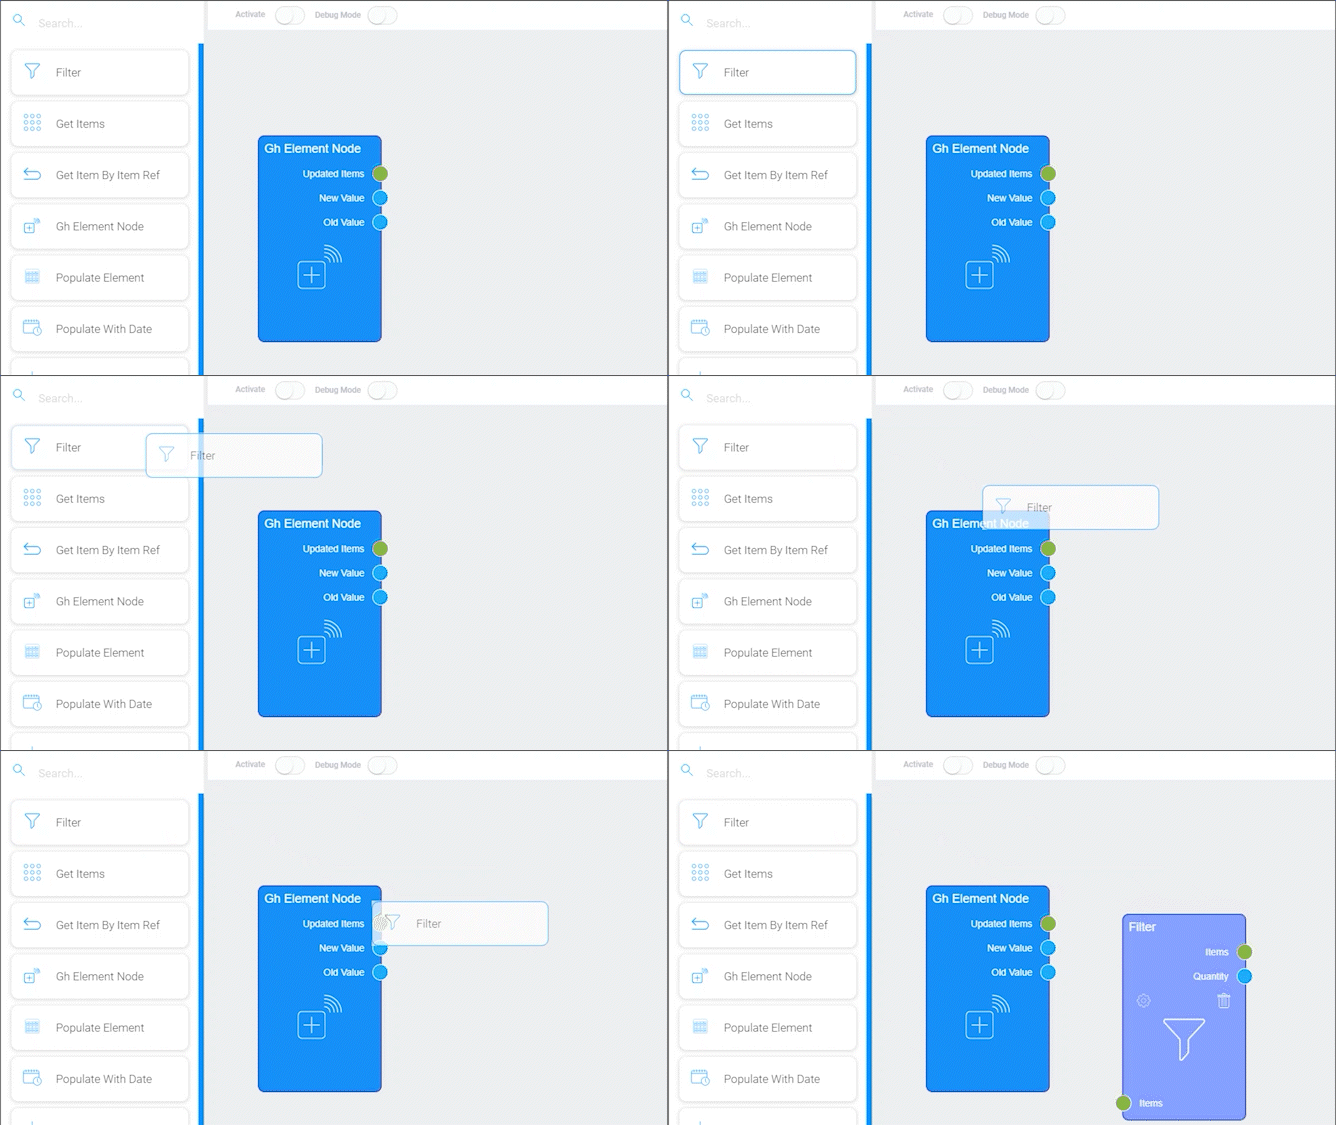
It consists of a search field and blocks of nodes that can be dragged into the editing area.
Debug Mode
The Debug Mode allows you to check the operation of the chain of nodes before using it.
The process of debugging automation consists of preparing test data and debugging itself.
Mock Settings
The debug process always needs the test data. Such debugging data are called mocks. The mock settings are designed to do the templates for the debugging. Just like the full automation settings, the mock settings are different for several elements.
Standard Elements
The current settings are typical for most gh-elements. Exceptions will be considered in the next section.

| Name | Description |
|---|---|
| Name | allows to give a name to the template; details... |
| Old Value | allows to enter the old value of the current element; details... |
| New Value | allows to enter the new value of the current element; details... |
| Field | allows to select the field by which the item will be selected; details... |
| Item | allows to select the item; details... |
| Edit | allows to edit or delete the template; details... |
Special Elements
As noted above, only three gh elements have such mock settings.

| Name | Description |
|---|---|
| Name | allows to enter the name of the template; details... |
| Output | allows to select the type of the output socket; details... |
| Settings | allows to enter the mock data; details... |
| Edit | allows to edit or delete the template; details... |
Debugging Process
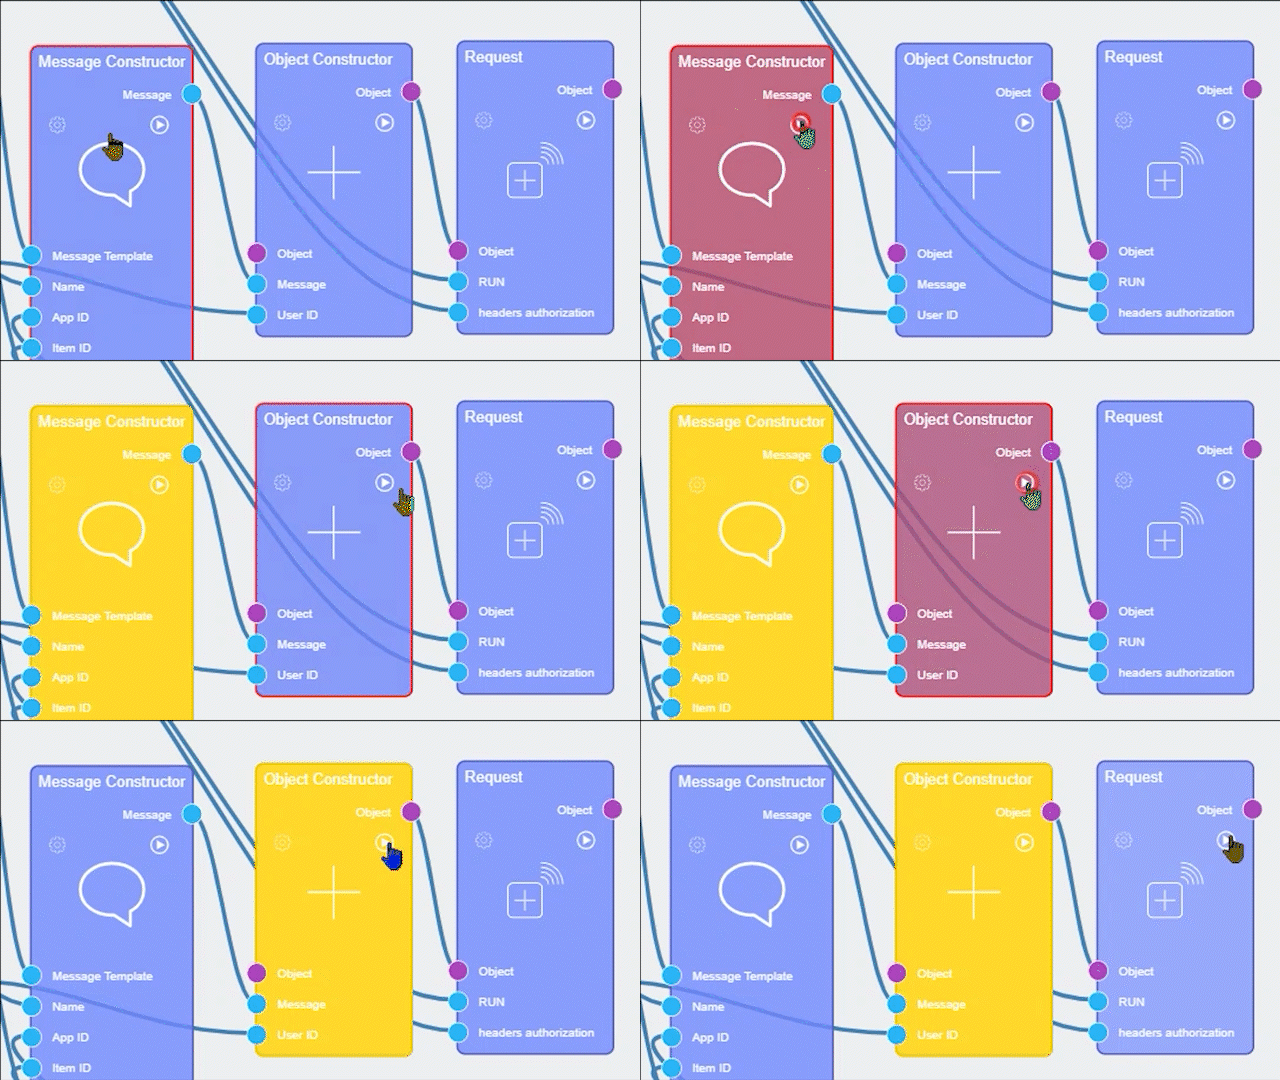
When the mock template is selected, you can start debugging. To do this, press the start button near the mock settings. Then the first node will be highlighted.
The debug process starts from the first node after the default node.
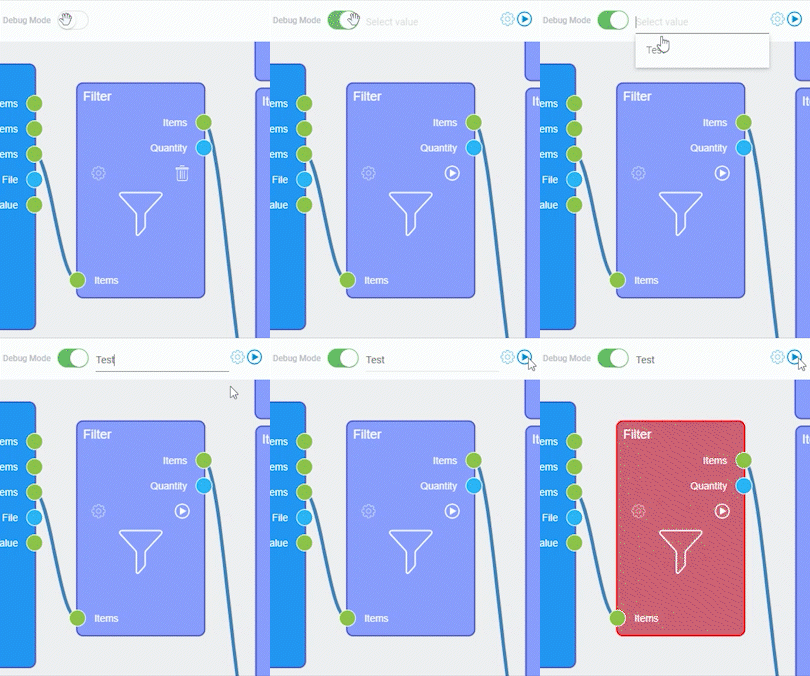
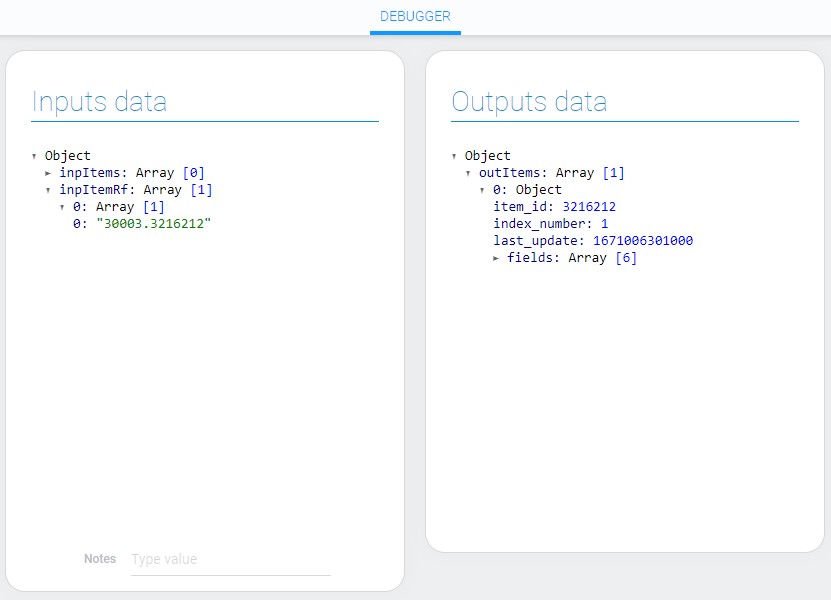
After that, you can open the node settings and check the data that is transmitted to and from the node.
Then click on the play icon on that node and debugger will switch to the next node. After switching to the next node you can check its data.
Settings Descriptions
This chapter contains the detailed description of the whole settings related to Debug Mode.
Name
This mock function is mandatory for all types of elements. Its main purpose is the naming of templates. Thus, you can enter any name for your template.
Old Value
This is a mock value that will be used as the old value of the current element. This setting is available in the automation settings of almost all items.
New Value
The value entered in this field will be used as the new value of the current element during debugging. You can do it in settings of the standard elements.
Field
The current setting works in conjunction with the following. It allows you to select the field of the current application whose values will be used as names of items. That helps to select item for the debugging.
Item
As was said above, this option works in pair with Field. When you select a field in the previous setting, all its values will be displayed in the drop-down list of the current setting. This allows you to select an item for debugging by the value of a particular field.
Output
This is the function typical for only a few elements. It allows to select the output socket that determines the type of data for debugging. But Smart Input has one nuance, in its settings, not the sockets themselves are specified, but the type of element that defines the whole group of sockets.
Each of these elements has its own default node with a unique set of sockets. And the data type depends on the selected socket. Nodes have a name that corresponds to the element:
- API -> API
- Trigger -> Trigger
- Smart Input -> Smart Input
So, there are three different sets for different elements:
- API:
- GET
- HEAD
- POST
- PUT
- DELETE
- Trigger:
- Created Items
- Deleted Items
- Updated Items
- Updated File
- Updated Value
- Smart Input:
- Button
- Input
- Form
- List
Settings
The current setting is designed for large amounts of mock data. It opens a tab where you can enter various objects or arrays. Only three elements have this setting.
Edit
This is the function that consists of two buttons. The first button allows you to edit the template, and the second - to delete it.

 Edit document