
How to Set Up an AI Assistant in CRM #
Integrating an AI Assistant into your CRM unlocks new opportunities for automating business processes. Unlike traditional chatbots, modern AI agents can understand the context of customer interactions, work with company data, and assist both customers and employees.
By introducing an AI Assistant into your CRM, businesses can distribute workloads more efficiently by delegating routine tasks to artificial intelligence. This helps teams spend less time on repetitive work and focus on higher-value activities.
As a result, more and more companies are adopting AI Assistants as a practical tool for streamlining internal operations and improving overall team productivity.
What Is an AI Assistant in a CRM System #
An AI Assistant is an artificial intelligence-powered tool designed to automate tasks within a CRM system. It can analyze information, process customer inquiries, generate responses, create content, and perform a wide range of other AI-powered tasks.
The GudHub AI Assistant supports multiple AI models, including Claude by Anthropic, Gemini by Google, OpenAI, DeepSeek, and Grok by xAI. To start using a specific model, you need to connect the corresponding API Key.
You can learn how to generate and connect an API Key in our guides:
Once configured, the AI Assistant can automatically use the selected AI model to perform tasks within the CRM, without requiring any additional actions from the user.
How the AI Assistant Work #
The AI Assistant operates using artificial intelligence models connected to the CRM through an API key. Once configured, the system can automatically send requests to the selected AI model and use the generated results within its workflows.
After being created, the AI Assistant becomes an active participant in the CRM environment. It has its own profile, assigned permissions, and can perform tasks according to its role, just like any other user in the system. This allows it to function not merely as a standalone tool, but as an additional team member that helps handle routine work and supports day-to-day operations.
Whenever a task in the CRM requires AI-powered processing, the assistant generates a request and sends it to the connected AI model. Once the request has been processed, the result is automatically returned to the CRM and can be used in subsequent workflows.
 During setup, you can also assign one of the available personas to the assistant. A persona defines the assistant’s initial specialization and helps tailor its behavior to specific responsibilities. For example, an AI Assistant can be configured to support content creation, marketing, SEO, design, project management, or other business functions.
Benefits of Using an AI Assistant in CRM #
An AI Assistant helps automate everyday tasks within a CRM system and reduces the workload on employees.
By integrating AI into your workflows, businesses can:
- respond to customer inquiries more quickly
- automate repetitive and time-consuming tasks
- reduce the time spent preparing responses and documents
- process and analyze large volumes of information
- improve the efficiency of internal business operations.
How to Create an AI Assistant in CRM #
Step 1 #
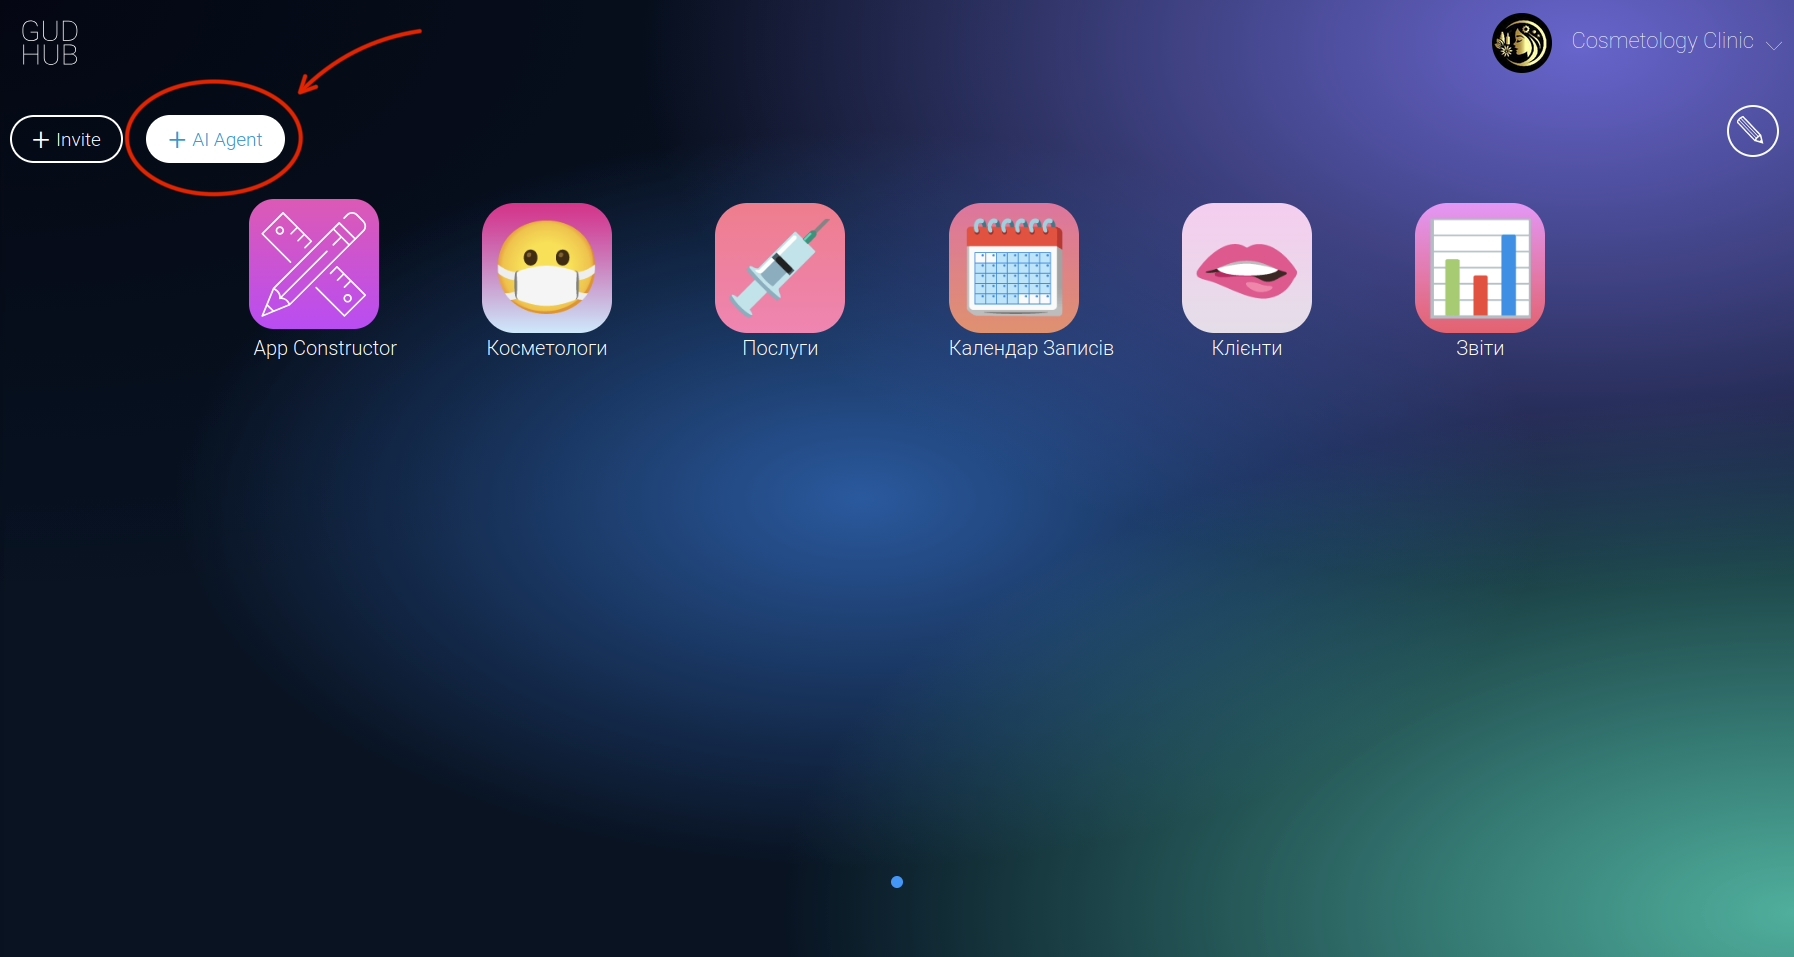
Click the “+ AI Agent” button on the main CRM dashboard.
Step 2 #
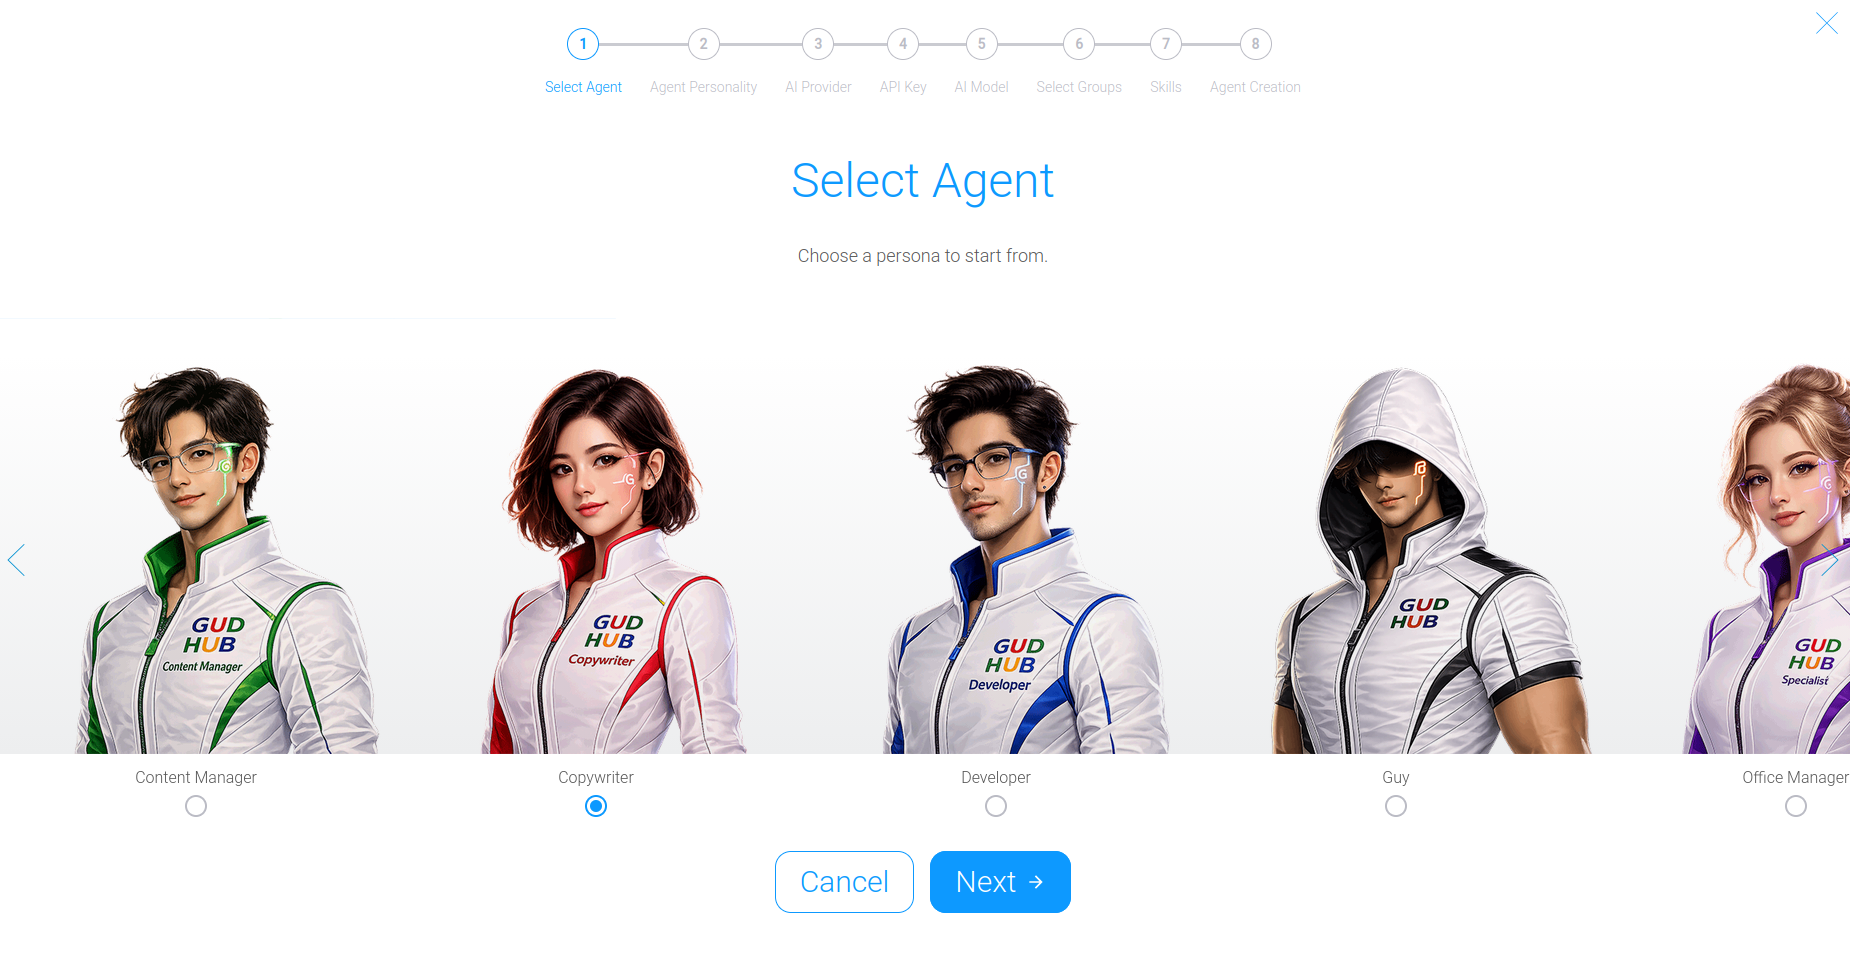
Choose an AI Assistant persona.
A persona defines the Assistant’s initial specialization and default configuration.
Step 3 #
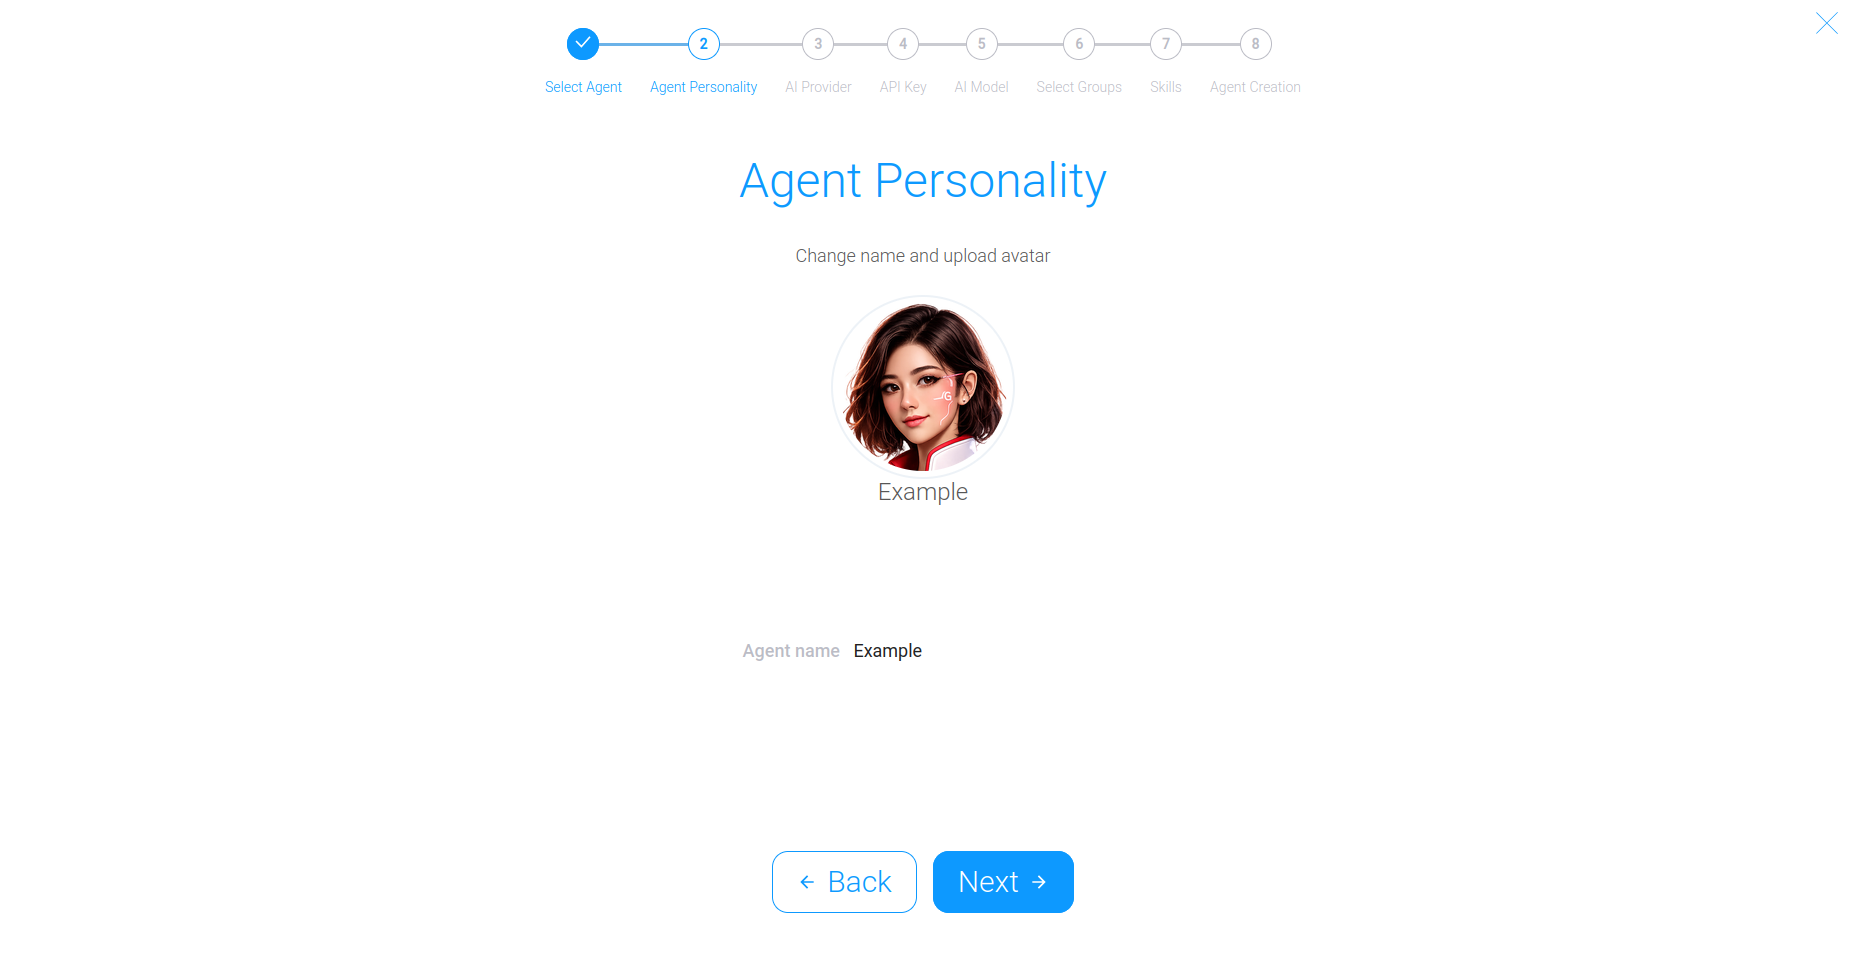
Customize your AI Agent.
You can assign a name and upload a custom avatar.
Step 4 #
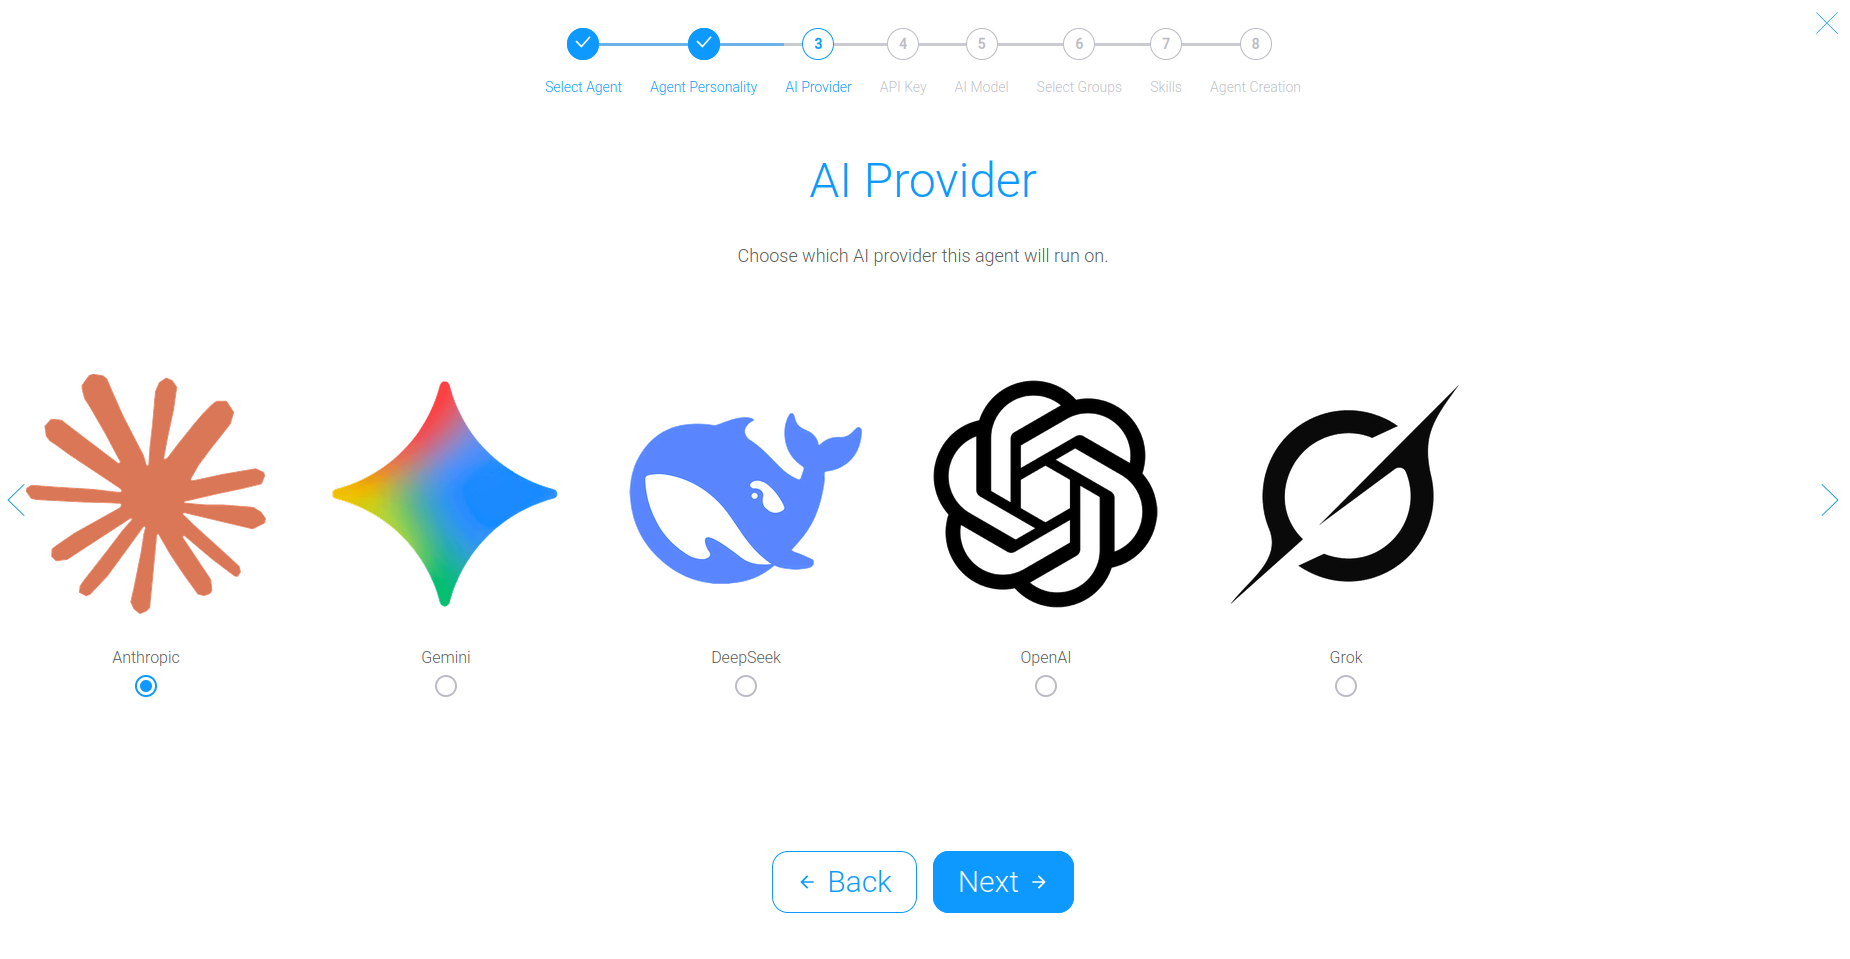
Select the AI provider that will power your Assistant.
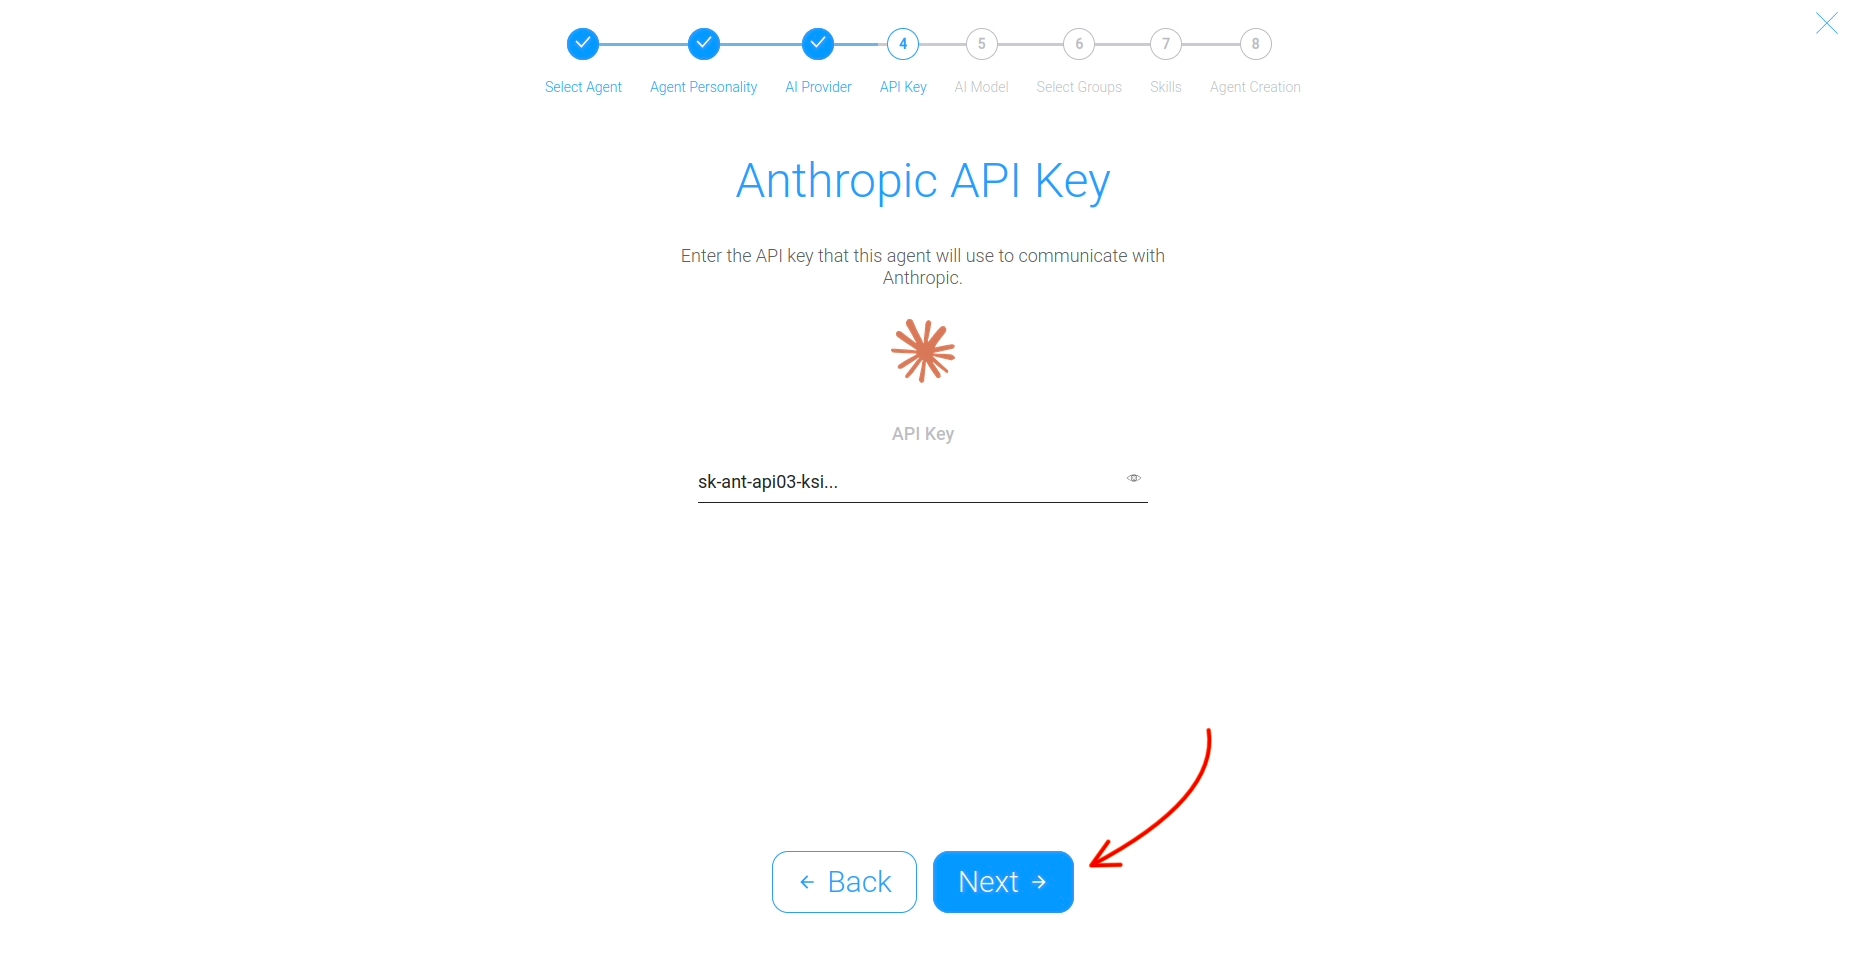
Step 5 #
Enter the previously generated API Key into the corresponding field and save it by clicking “Next”.
A detailed guide on how to generate API Keys for different AI providers is available in our articles:
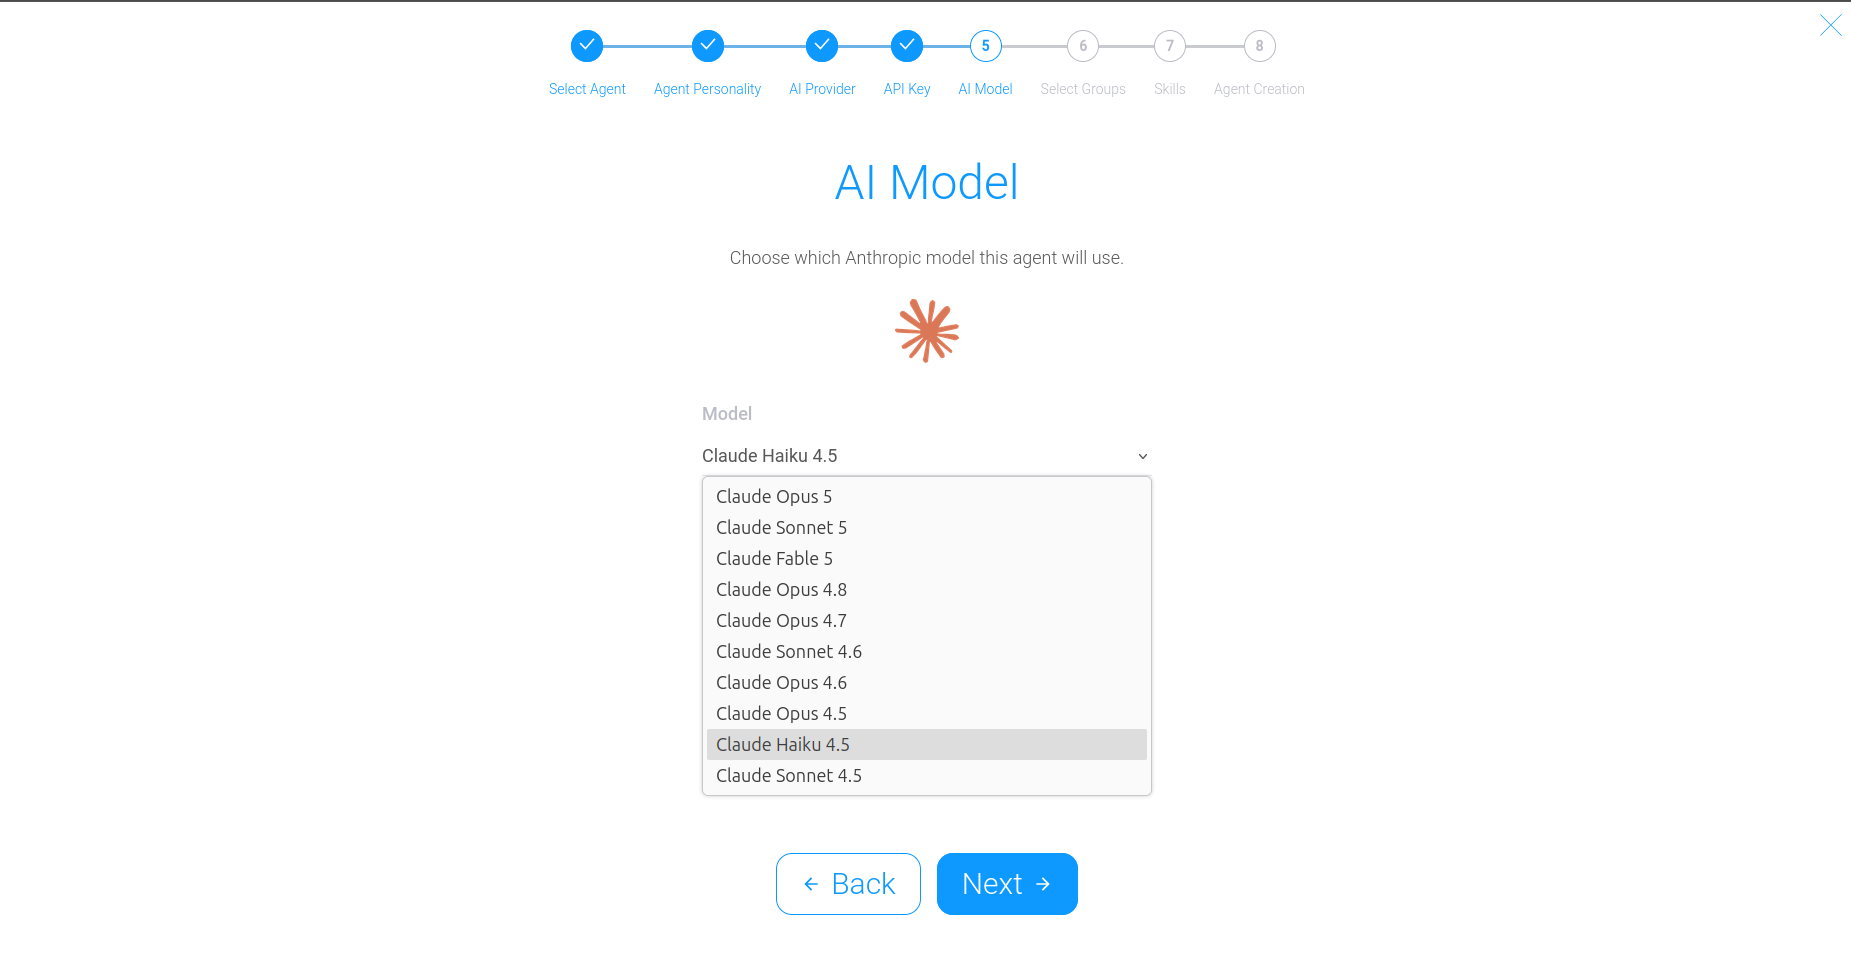
Step 6 #
Choose the specific model provided by the selected AI provider that the Assistant will use to perform tasks.
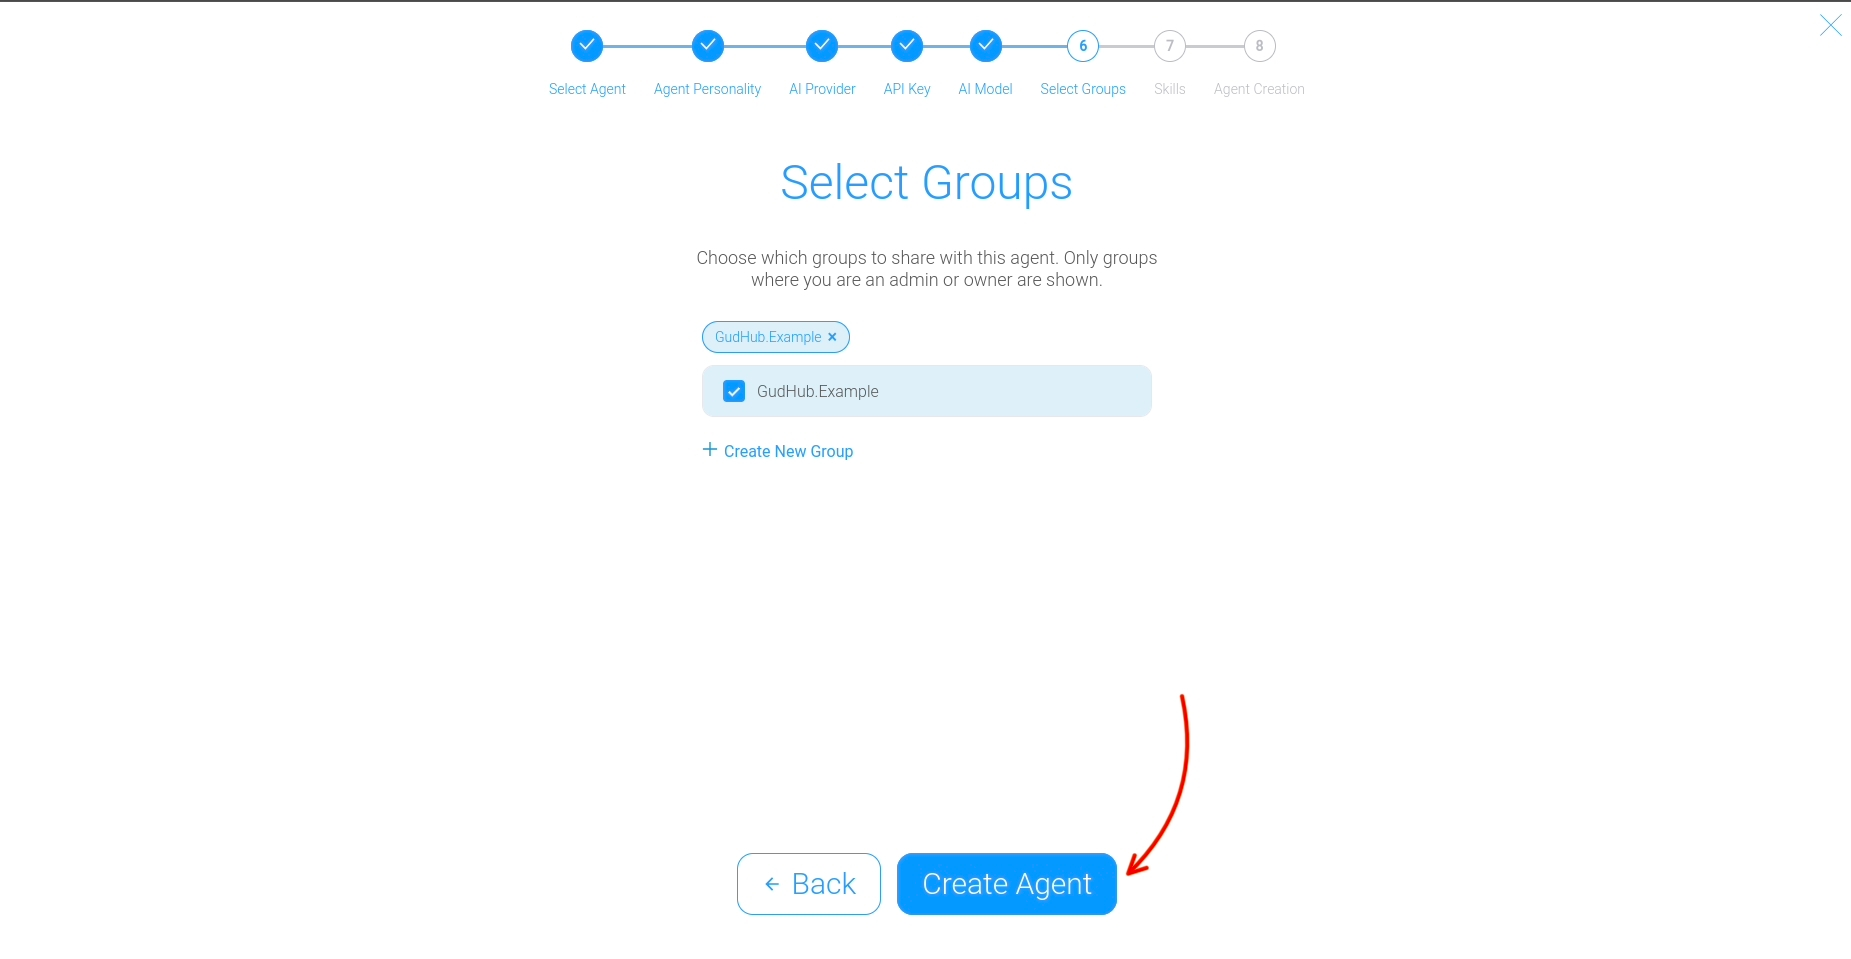
Step 7 #
Add the AI Assistant to a Group
If user groups have already been created in your CRM, you can assign the AI Assistant to one or more of them. Once added, the assistant becomes part of the selected group and can participate in team workflows, performing tasks according to its configured role and permissions.
 If no groups have been created yet, click “Create New Group” and create a new user group.


 After configuring the groups, click “Create Agent” to create the AI Assistant and apply the selected settings.
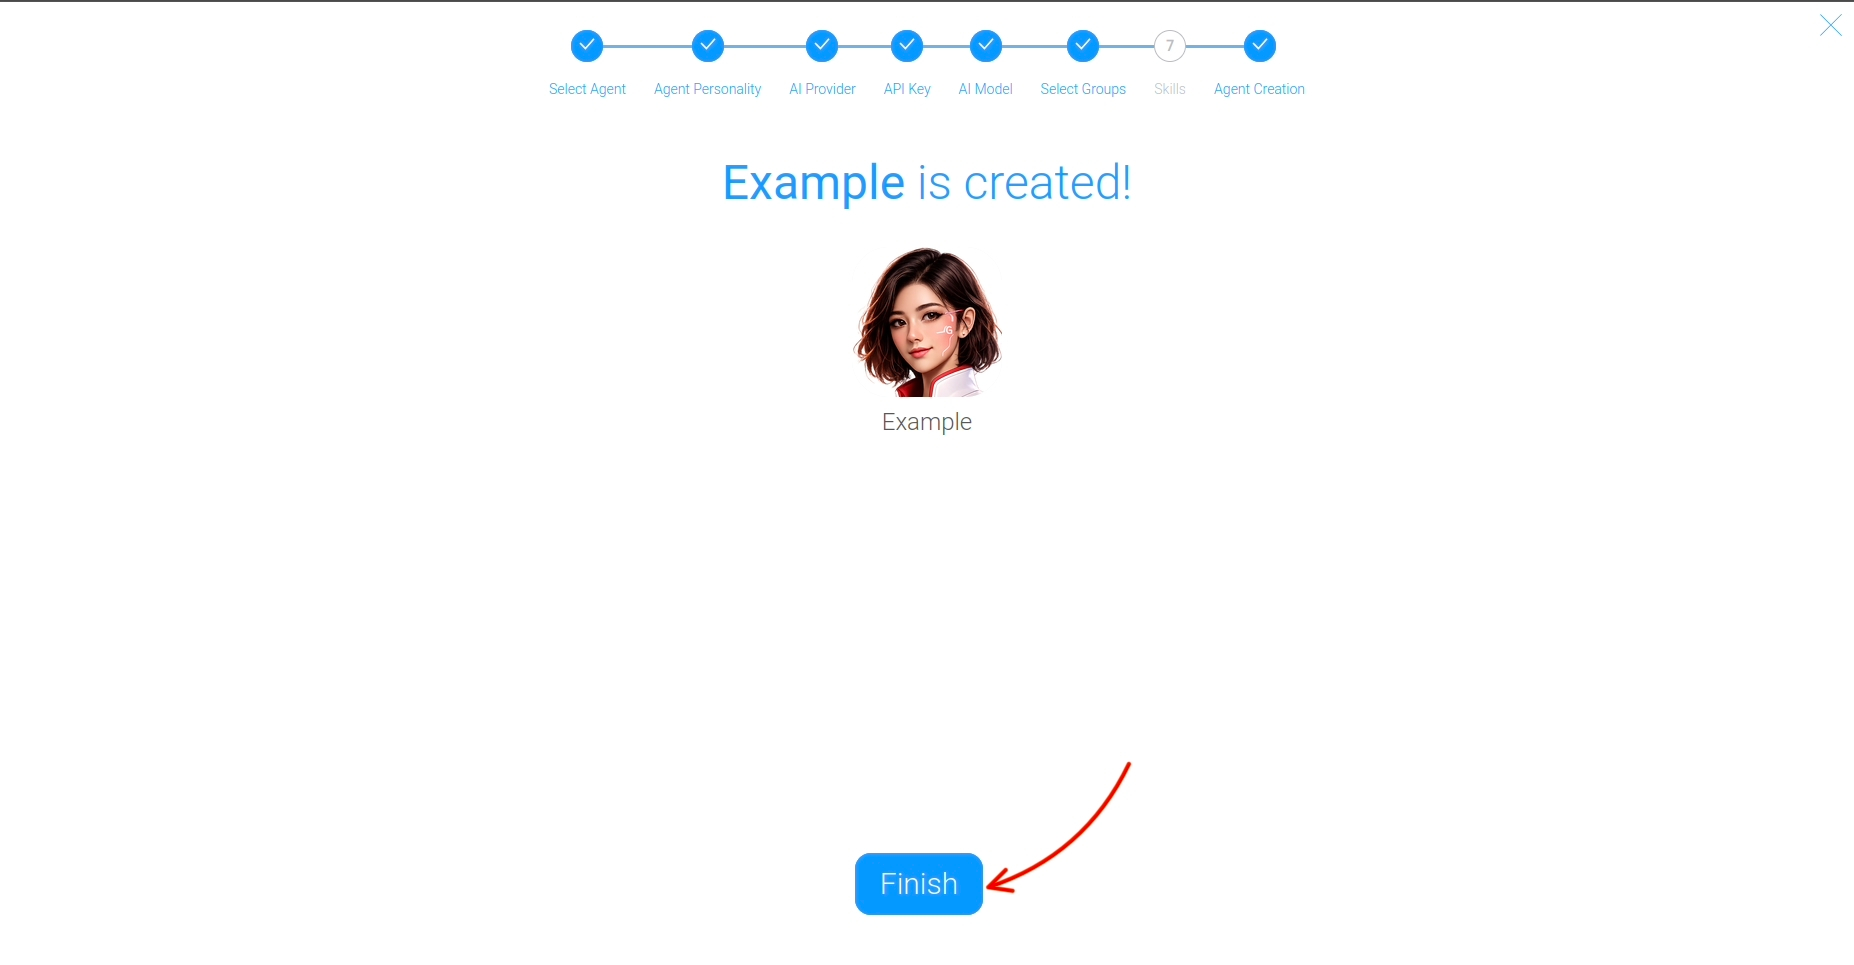
Step 8 #
Your AI Assistant has been successfully created.
To complete the setup process, click “Finish”.
Once the setup is complete, the AI Assistant will be available in your CRM and ready to use. If needed, you can update its settings, enable additional capabilities, expand its functionality, and adapt its behavior to support your company’s specific business processes.